Android TV & STBs
  Interactive screens
  Digital Signage
  Information Kiosk
  Phones, Tablets, and Laptops
  Point Of Sale Devices: PoS/mPOS
  Rugged devices
  Custom devices
  Configuration Management
  Remote Support
  App Management
  Kiosk Mode
  Device Analytics
  Firmware Management
  Geo-fence and Anti-theft
  Customer Care


 TV Operators
  Hospitality
  Education
  Healthcare


Overview
Deploying device settings certificates is important for web filtering, VPN authentications, and many other use cases. These device settings options on the Radix Device Management interface allow you to install VPN and app certificates. You may use the Device Settings repository to deploy several certificates to as many devices at once.
Table of Contents
Creating a Certificate Setting Bundle
To apply a certificate to a specific device, you must first open the Device Settings interface.
There are four methods to open the Device Settings repository:
- First Method: Using the Repositories Console
- Second Method: From the Device Console Ribbon
- Third Method: Using the Device’s Kebab Menu
- Fourth Method: From the Device Dashboard
First Method: Using the Repositories Console
- Click on the Repositories Console icon on the left-hand side of the Overview Dashboard.

- From the Repository commands options, click on Device Settings.

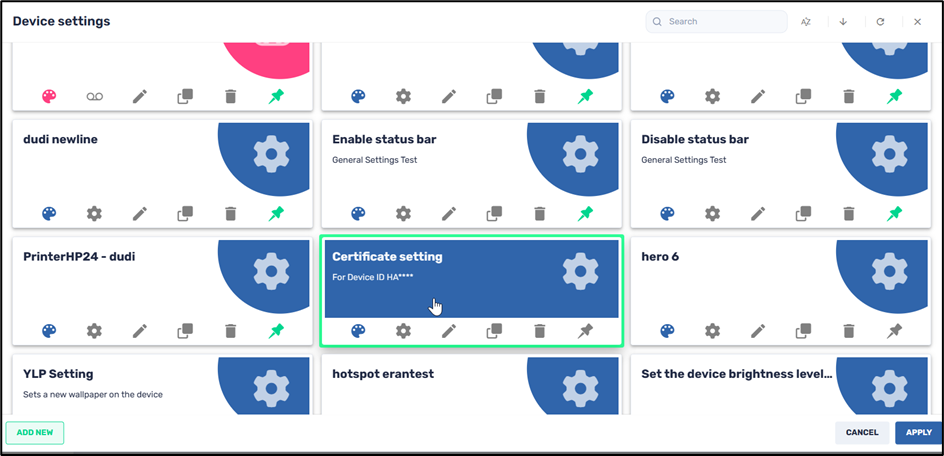
The Device Settings window opens, showing saved device setups.
Second Method: From the Device Console Ribbon
- Click on the Devices Console icon on the left-hand side of the Overview Dashboard.

- From the Devices Console, select the device to which you would like to apply the device settings certificate by clicking on the checkbox in the column on the far left.
Note: This method has the advantage of allowing you to select several devices at once, and then apply the certificate to all of them simultaneously.
The icons at the top of the Devices Console (the “Devices Console Ribbon”) become active. - Click on the Device Settings icon.

The Device Settings window opens, showing saved device setups.
Third Method: Using the Device’s Kebab Menu
- Click on the Devices Console icon on the left-hand side of the Overview Dashboard.
- From the Devices Console, find the device to which you would like to apply the certificate, and click on the kebab menu in the far-right column:

The menu of Device Manager commands opens.
- Click on the Device Settings icon. The Device Settings window opens, showing saved device setups.

Fourth Method: From the Device Dashboard
- Click on the Devices Console icon on the left-hand side of the Overview Dashboard.
- From the Devices Console, find the device to which you would like to apply the certificate, and click on the line of that particular device.

The Device Dashboard opens.
- On the right-hand side of the screen, click on Repositories Actions. A drop-down menu appears.

- Click on Device Settings. The Device Settings window opens, showing saved device setups.
Applying a Certificate
Once we have opened the Device Settings window, we can apply a new certificate to a device.
To apply a new certificate:
- From the Device Settings window, click on Add New.

- In the New Setting window, supply a name and description for the new certificate setting.

- Click on the Set as Private button if you want this device certificate setting to be visible only to you, in the Device Settings Window.
- Click on the Set as read-only button to limit who can edit the details on the device settings.
- Click on the Certificate icon in the menu on the left.

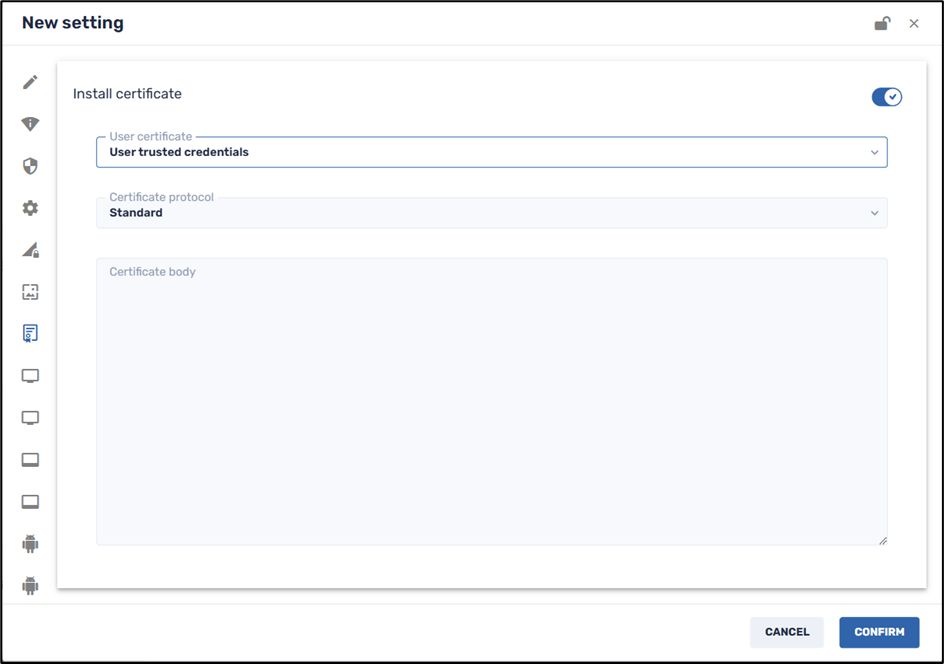
- Click on the Install Certificate button. You will see four User Certificate options:

- User-trusted credentials: You will be prompted only to supply the text of the body of the certificate:
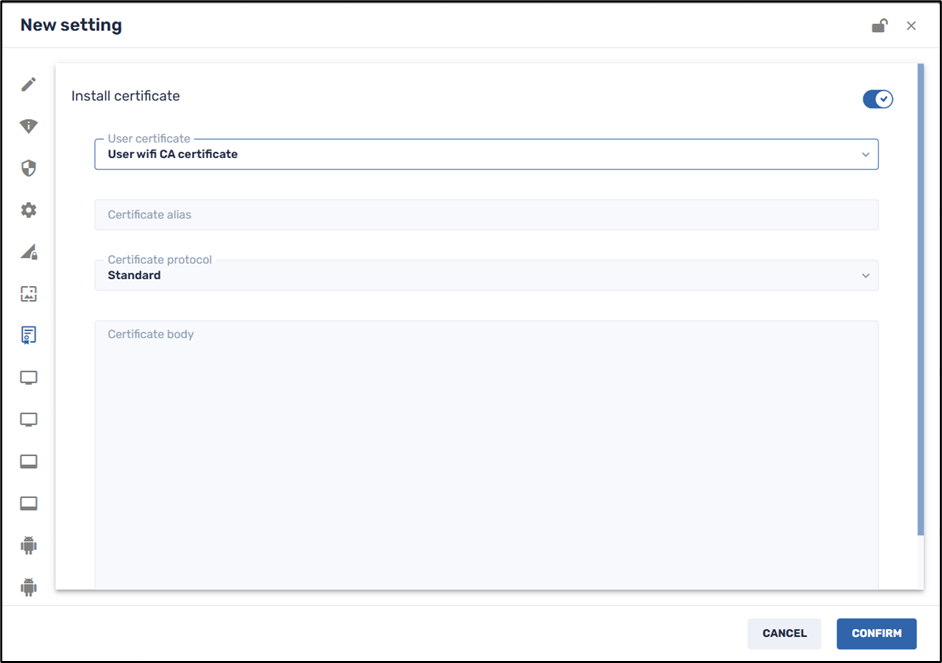
However, for the other three options, you will be prompted to provide a certificate alias as well as the text of the certificate:
- User Wi-Fi CA ( = Certificate Authority) certificate
- VPN and apps certificate
- User private key Wi-Fi certificate
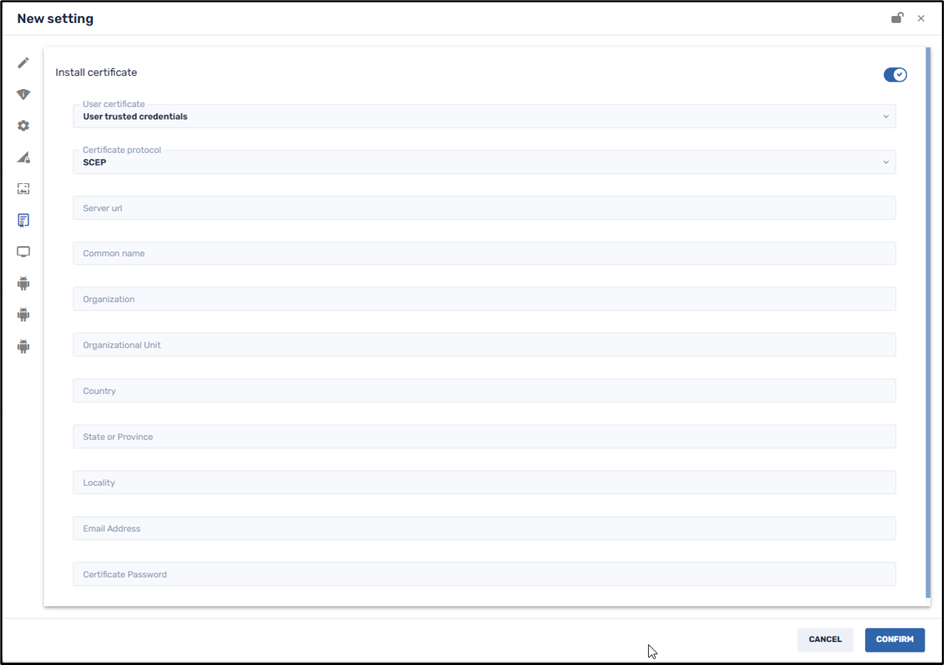
Certificate Protocol Options
Note the Certificate protocol options. There are two possibilities:
- SCEP (“Simple Certificate Enrollment Protocol”)
- Standard Certificate Protocol
Here is a brief explanation of each option:
Simple Certificate Enrollment Protocol Option
1. When you select the SCEP option, you will need to complete details about your organization, as well as the SCEP server URL, your email address, and the certificate password, to access the device certificate.
Standard Certificate Protocol Option
1. For the Standard Certificate Protocol, you will need to paste the content of the certificate in the Certificate Body field.
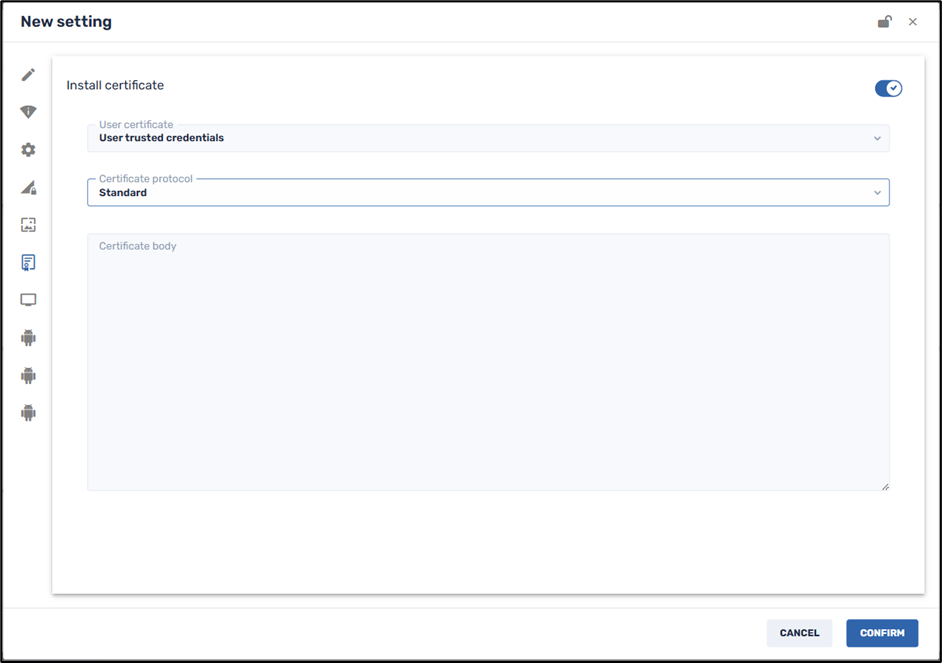
To employ this option, first obtain the certificate file and copy the text content (all of it). The text will probably be encrypted, and will look something like this:
—–BEGIN CERTIFICATE—–
htyC0DCCAbigAwIBAgIJANo7qOC32G2qMA0GCSqGSIb3DQEBCwUAMBgxFjAUBgNV
AMTDXBhLm5lc2gubG9jYWwwHhcNMTcwODE3MTQwNDA2WhcNMjEwODE2MTQwNDA2
WjAYMRYwFAYDVQQDEw1wYS5uZXNoLmxvY2FsMIIBIjANBashlEidykkGPnsTF90Z
z6x/XfD967VVUMzSptosFpk67rkTKpbXIlREfvk1V59ZDIQ45cREq8LTU4WWUwCe
hc0/EniQEAQBCI3Srlwp8Y47EPvdylm4mBPDDlVsM3z5DOaYeU0XjAvfbt0AiaFh
6XMrjuNggrwkknrR4WjRFaphq0TDmrsKRbooodAIPKBHeqJI1h2skNyFMC5MKNEF
lQPzzkkPVLAc5HQqgRvCxsR6ryRx+7kWruyeIK4omMIwFECiluh4GPt7GAUi3z1G
Gui3k45fzwHDYoyIxek81wu1q8scoBFMaQASP121OUnm4qciml6H06+BmqKkNGeN
n5yrwUtVy1EncNNz2Nf4LX1MPncqctergt38AIJBiFrU8fu3PclrQkslTqtS5vEQ
YXb67BgtXS0K2ifsLQQcgPKdm+84DMDv8EMGiwIDAQABox0wGzAMBgNVHRMEBTAD
AQH/MAsGA1UdDwQEAwICBDANBgkqhkiG9w0BAQsFAAOCAcLhi0IVHrZ1IkDsP/87
ofki5ceJA0JNRl8oemlwmKedLJU+alAea3shsTvjgkqhkiG9w0BAQEFAAOCxCVVj
AQ8AMIIBCgKCAQEAyjXFMS0g5D9qtjUiOR0Jx2Tp8EqiwE3GcKZzc9u4Vr4GDzcf
9qvuO4qZA4lKUtmst8pbstWh8d0gdwQbSY1uV1k8/vjusyCy5YIDr1D8QgUnWNHG
R1gv79vj+qWDXEi1sOSiS2qMb0AJCbAVMstUNON9zNx3b1l6RXeHXBMaLgFVZmcT
dslirh=
—–END CERTIFICATE—–
2. After supplying the necessary certificate details, click Confirm. The certificate setting will be saved among the other Device Settings options.
3. To apply the certificate to a device, click on the tile of the desired certificate setting, and click Apply. This will deploy the certificate, like any other repository item.