Android TV & STBs
  Interactive screens
  Digital Signage
  Information Kiosk
  Phones, Tablets, and Laptops
  Point Of Sale Devices: PoS/mPOS
  Rugged devices
  Custom devices
  Configuration Management
  Remote Support
  App Management
  Kiosk Mode
  Device Analytics
  Firmware Management
  Geo-fence and Anti-theft
  Customer Care


 TV Operators
  Hospitality
  Education
  Healthcare


Overview
The Radix Device Manager features the Views Console, which allows you to create a setup for a remote device so that it can be used as a specialized kiosk display. Whereas the Kiosk option limits a device to certain websites and applications, creating a View allows your device to display a slideshow, video content, or even a custom-made combination of text and images that you compose yourself.
You can compile a repository of views with different thematic content. You can then distribute the views to different groups of devices, according to what you would like them to display.
Creating a New View
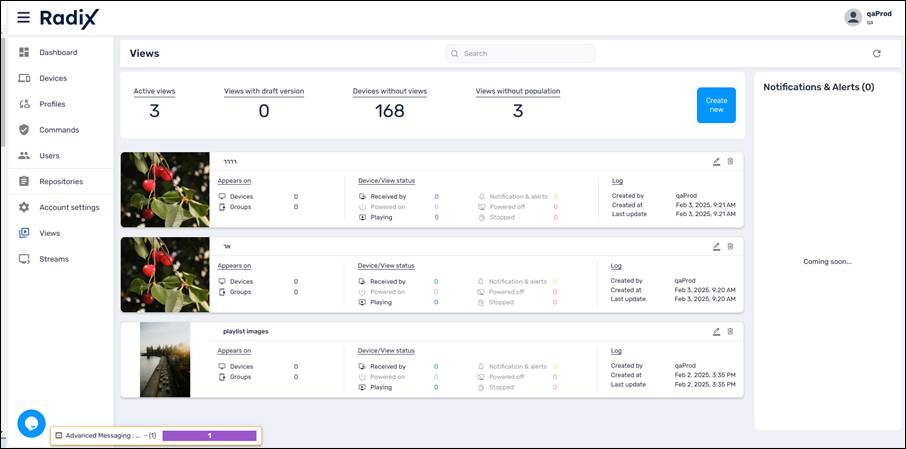
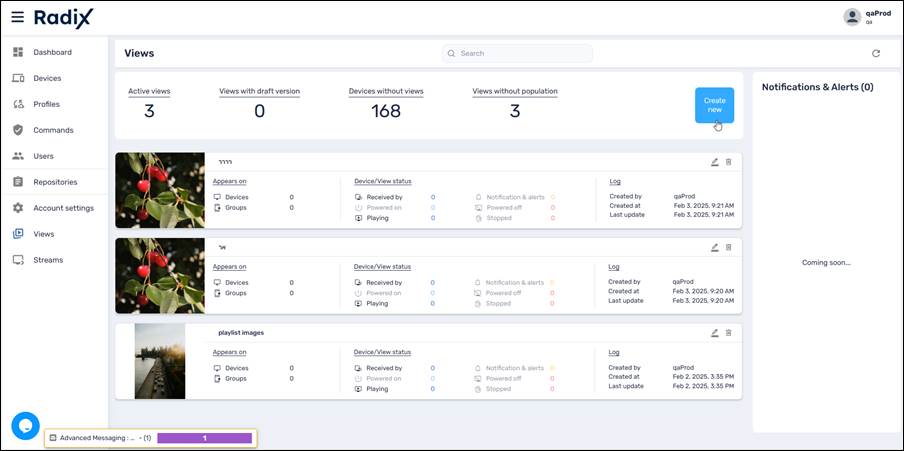
When you click on the Views icon in the sidebar menu, the Views Console screen opens:
To create a new View:
1. Click on the Create New button.
The Create new view window opens.
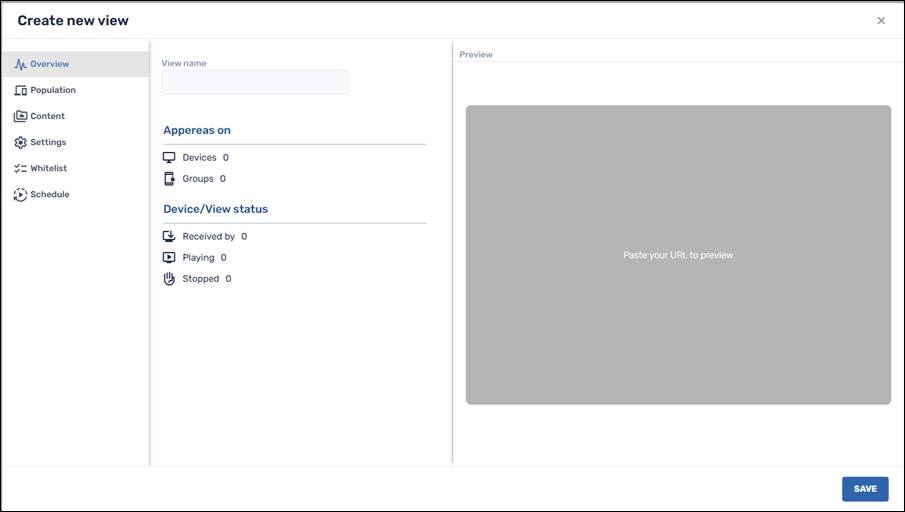
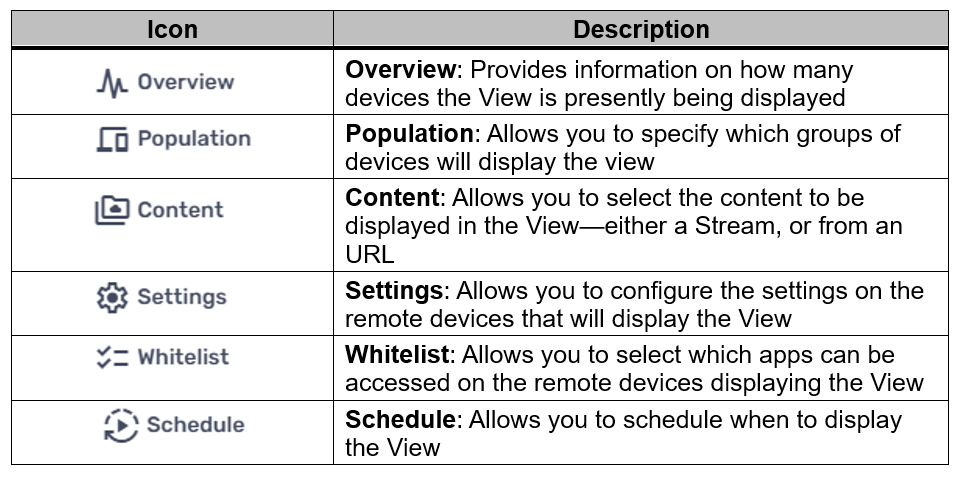
The sidebar menu in the Create new View window consists of the following tabs:
We will go through the options in greater detail in the following tabs:
When you click on Create new in the Views console, the Overview tab appears in the Create new view window. The Overview screen displays the statistics about which devices are showing a particular view.
To create a new view:
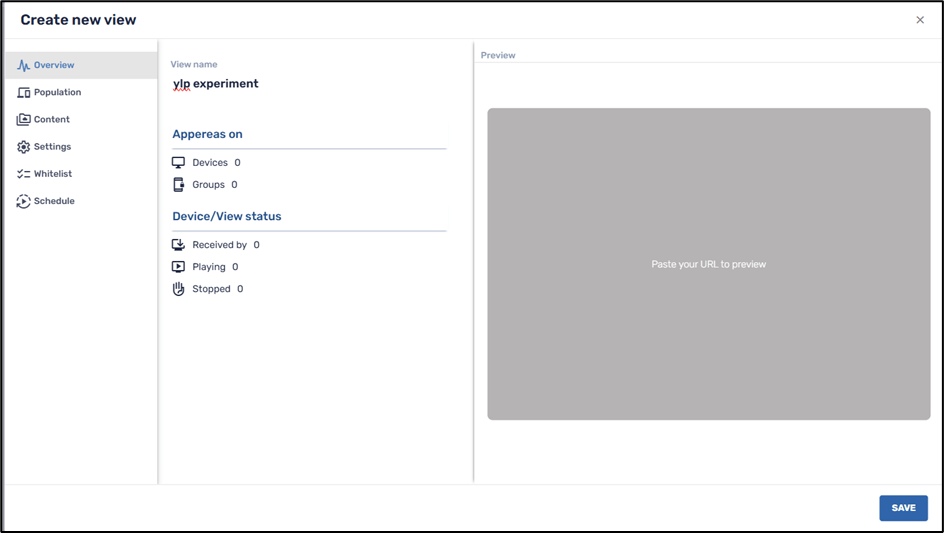
- Assign a name to the view in the View name textbox.
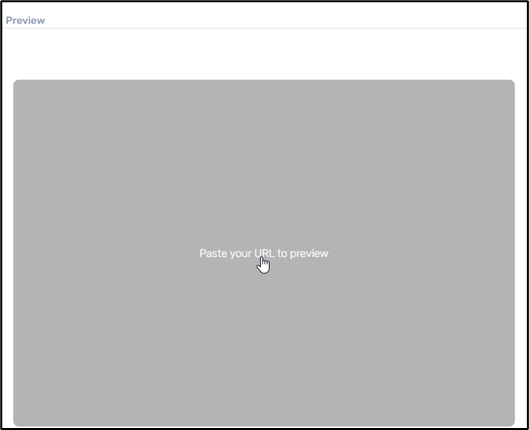
If the content of your view consists of a URL, click on the text “Paste your URL to preview” in the Preview screen.
You will be redirected to the Content tab, which we discuss below, where you can enter a dynamic URL:
1. Click on the Population tab in the sidebar menu. Here, you will associate the view with a group of devices. You can also add a filter to apply the View to only specific devices within a group.
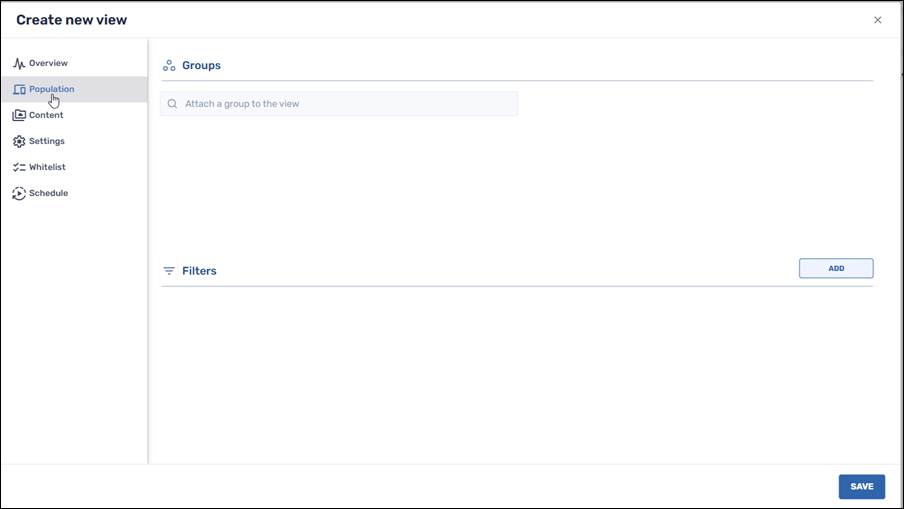
2. Attach a group in the textbox to apply a view to a group of devices.
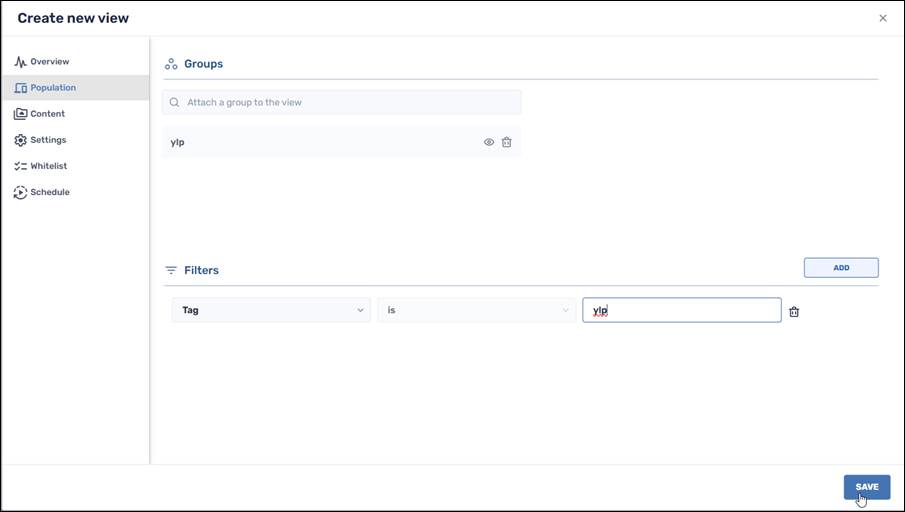
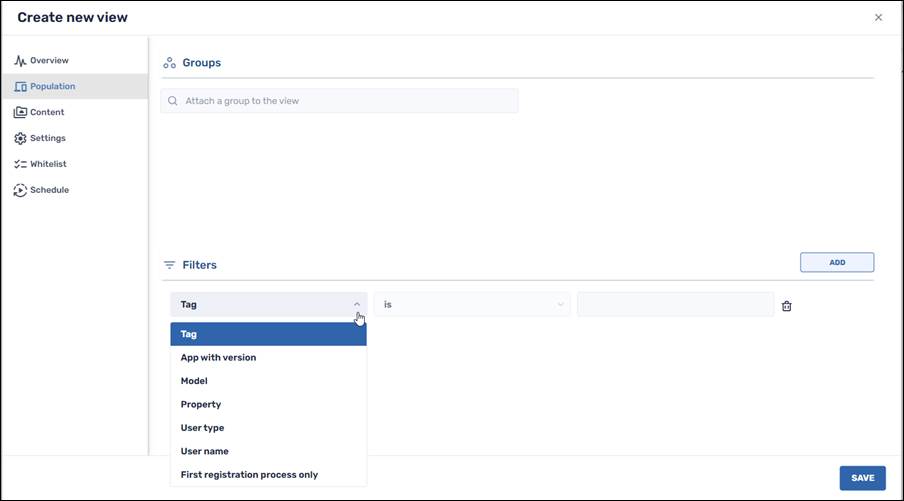
3. Click on the drop-down list in the Filters window to select filter conditions. You can apply several filters to narrow down the number of devices in the group to which the View will apply.
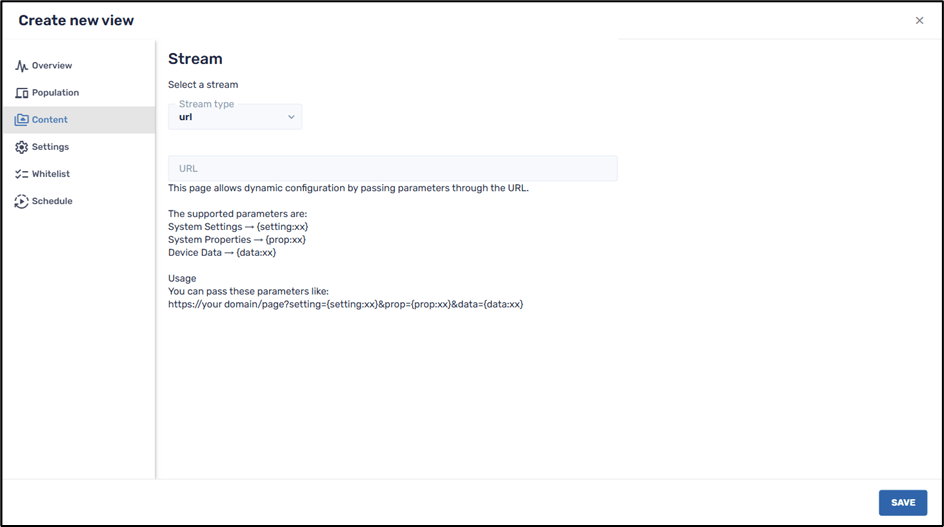
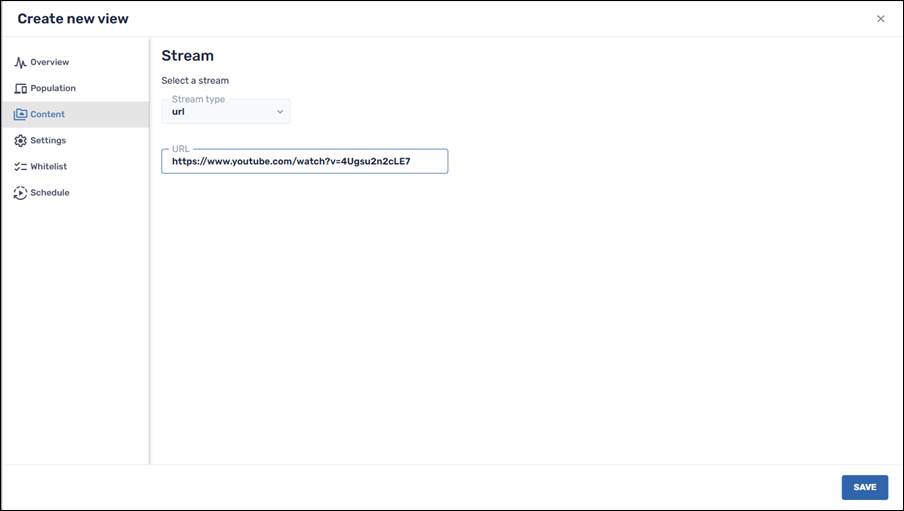
1. Click on the Content tab, and supply a URL or stream:
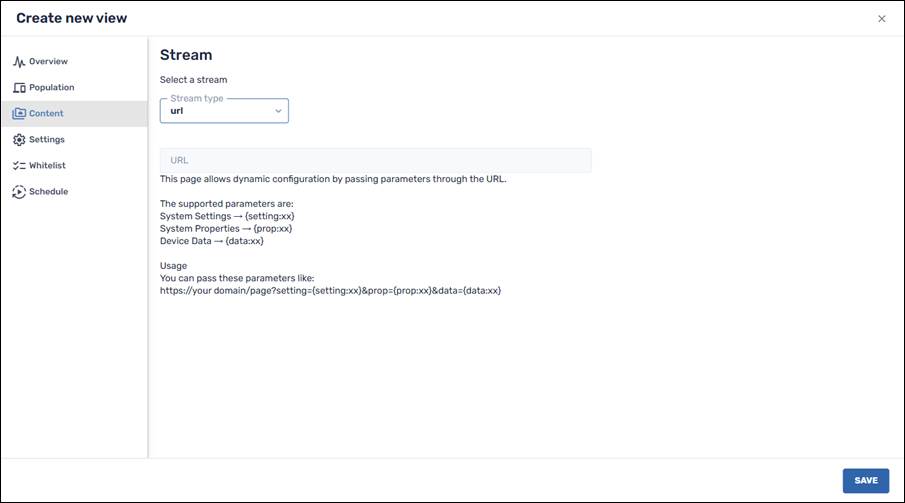
Option One: Using a URL for the View
If you wish to use a URL for your stream type, the Radix MDM will appear as follows:
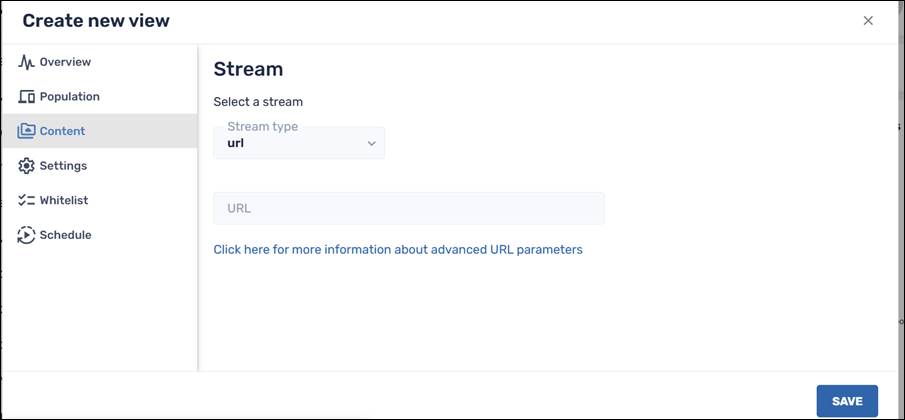
1. Paste the URL in the textbox as follows:
This page allows you to create a dynamic configuration by passing parameters through the URL.
To illustrate, a dynamic URL is of the form:
https://your domain/page?setting={setting:xx}&prop={prop:xx}&data={data:xx}
The parameters supported in this example are of the form:
- System Settings: Settings options can include volume_ring, screen_off_timeout, or user_rotation. The full list of Android settings options can be found at the website https://developer.android.com/reference/android/provider/Settings.System.
- System Properties: The Properties options can include the device’s product brand or model. The properties can be seen in the Device Dashboard.

System Properties in the Radix Device Dashboard
- Device Data: Data options can include the device’s Device ID in the Device Dashboard in the Radix MDM.
Practical Example of a Dynamic URL
As an example, here is a sample dynamic URL that will display a view on the Radix MDM:
Here is a table that explains the parameters in our sample URL:
| Parameter | Example |
|---|---|
| your-domain | itzikrb100.github.io |
| page | example-html-file/index |
| setting | {setting:screen_brightness} |
| property | {prop:ro.product.vendor.model} |
| data | {data:deviceid} |
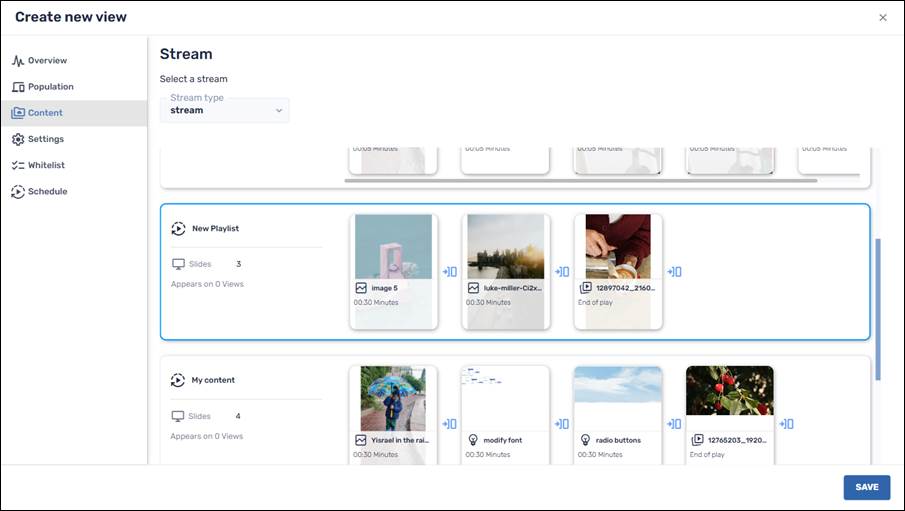
Option Two: Using a Stream for the View
If you choose to attach a stream to your view, it will open the repository of items in the Streams Console. You can select a Stream and attach it to the View. In the example below, we have added the Stream “New Playlist”.
- Click on the Settings tab, and select the settings for your new view:
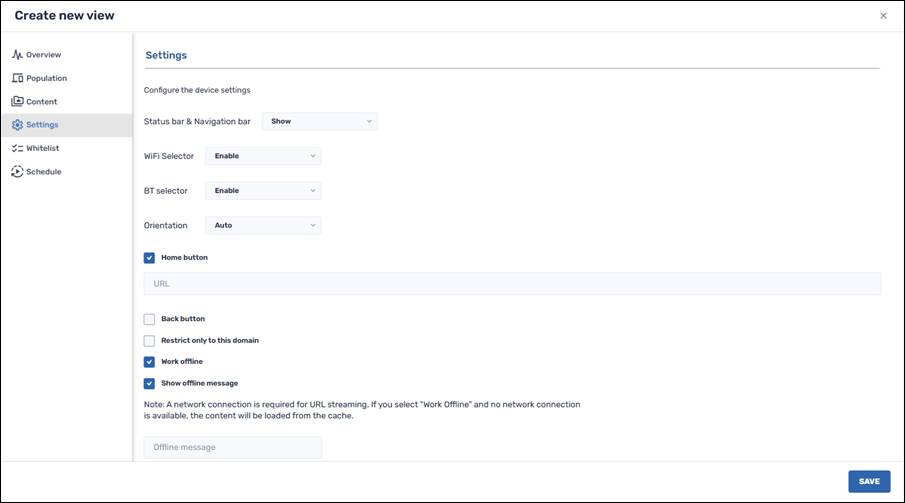
Status bar & Navigation bar: The options are Show/Hide. The red status bar appears at the top of the View display, while the navigation bar appears at the bottom of the View display.
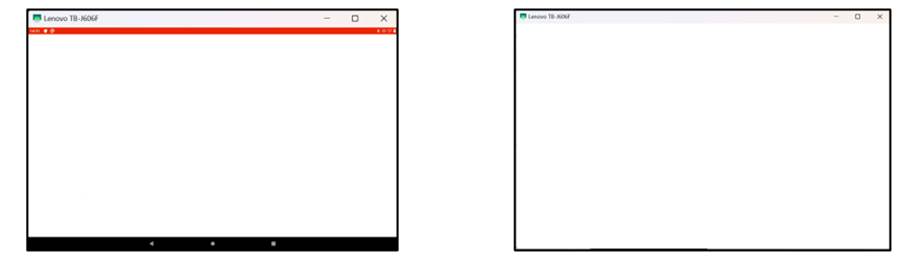
Tablet displaying status bar (left) and without status bar
Display Settings
The following two settings can be accessed on a tablet by pressing the Volume Up and Volume Down buttons repeatedly until the following screen appears. It displays three icons:
| Icon | Description |
|---|---|
| Select a Wi-Fi network | |
| Select a Bluetooth device | |
| Kiosk settings |
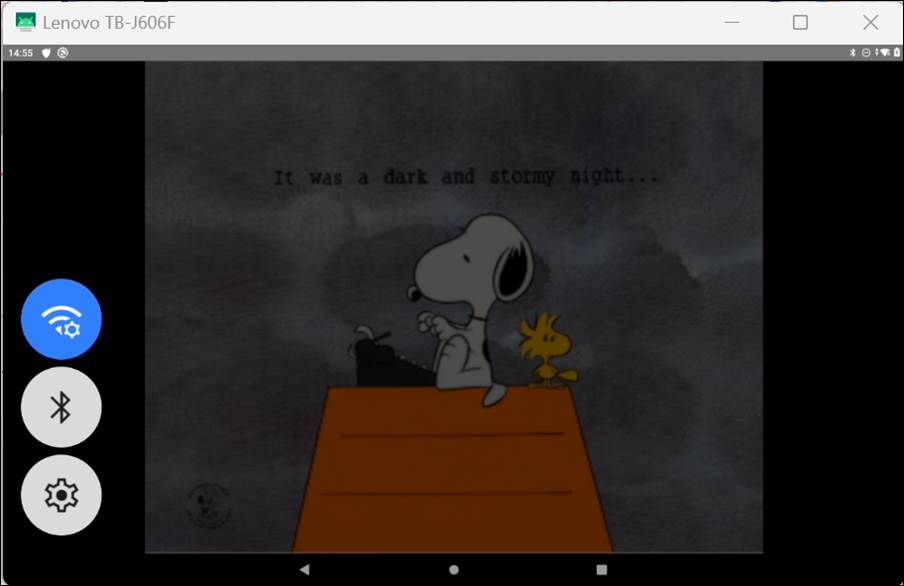
Settings icons while running a View
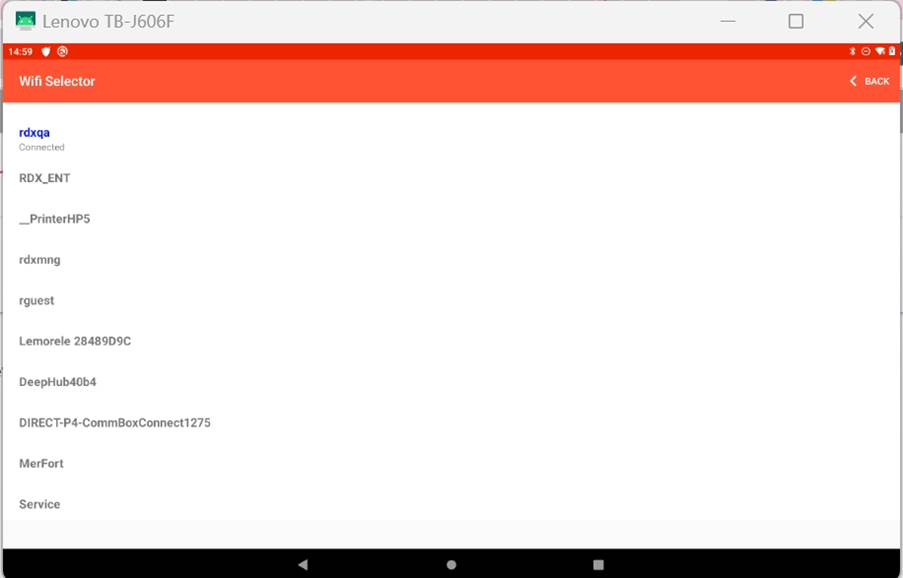
- Wi-Fi Selector: The options in the Views Console are Enable/Disable. This will display or hide the Wi-Fi selector icon. Clicking on the Wi-Fi selector displays the following screen:
- Bluetooth Selector: The options in the Settings window are Enable/Disable, to show or hide the Bluetooth selector icon. Tapping the Bluetooth Selector icon will open a list of Bluetooth devices in your area:

- Settings: Clicking on the Settings icon will open a menu that allows you to stop and restart a kiosk mode on the remote device:
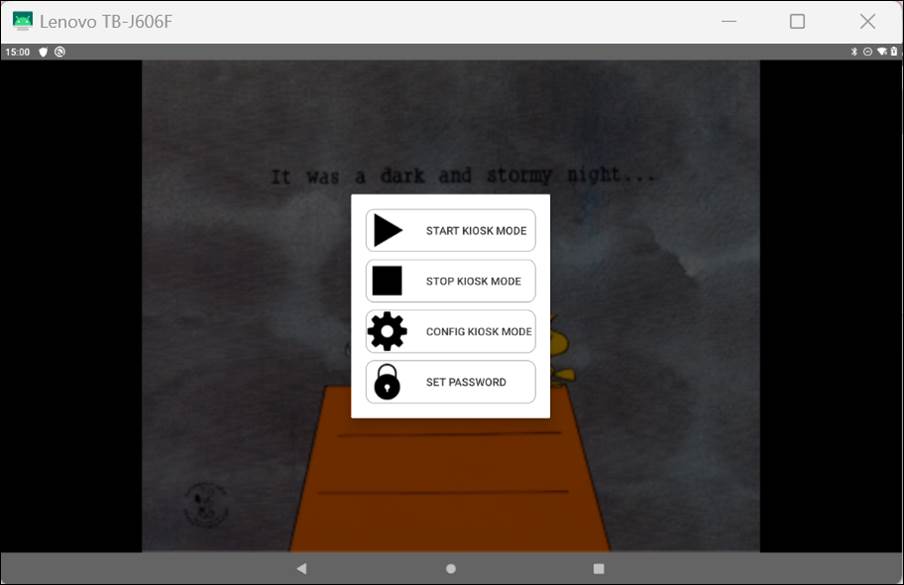
- Start Kiosk Mode will resume the View.
- Stop Kiosk Mode will stop the View and allow the remote device to revert to normal functionality.
- Note: This will only stop the View for a few minutes. It will be enough to allow you to use the other apps on the remote device until it goes back to displaying the View.
- Configure Kiosk Mode will allow you to create a whitelist or blacklist of URLs and applications, and whether to allow installing apps on the remote device, and other device settings.
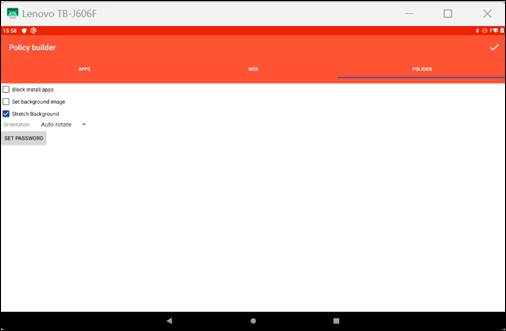
Policy builder tab
- Set Password allows you to set the password to access the device settings screen
More Display Settings Options
- Orientation: The options are:
- Auto: This allows the orientation of the device’s display to adjust automatically
- Portrait: This displays the View in portrait form.
- Landscape: This displays the View in landscape form.
Note the checkboxes in the Settings window:
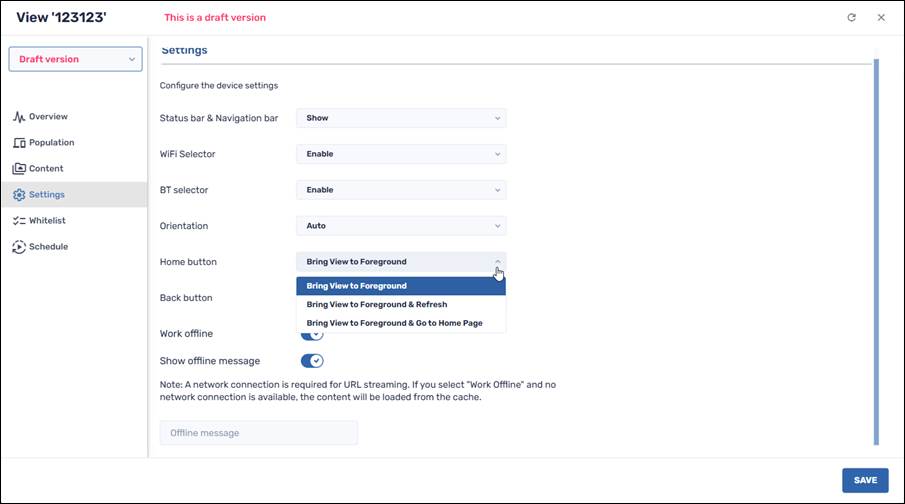
- Home button: The options here are:
- Bring View to Foreground
- Bring View to Foreground & Refresh
- Bring View to Foreground & Go to Home Page
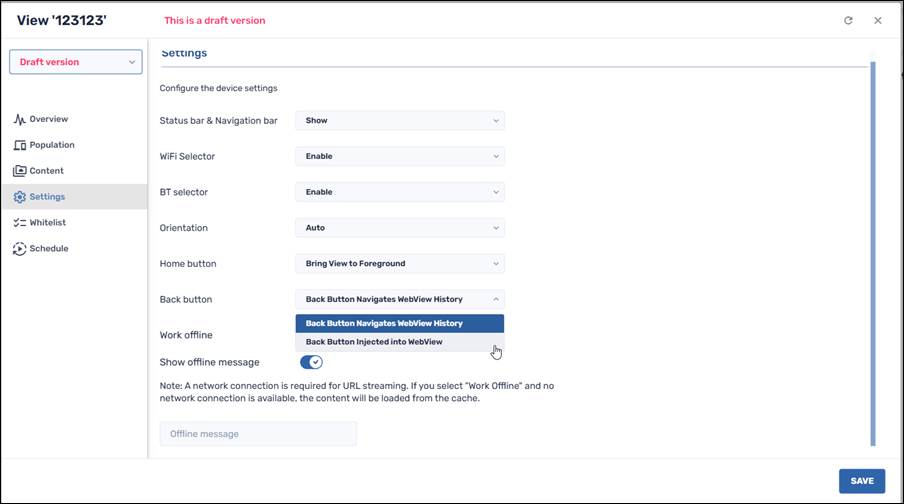
- Back button: The options here are:
- Back Button Navigates WebView History
- Back Button Injected into WebView
- Restrict only to this domain: This will limit the view only to devices in your current domain. When you logged into the Radix Device Manager, you entered the domain name in the Account textbox:
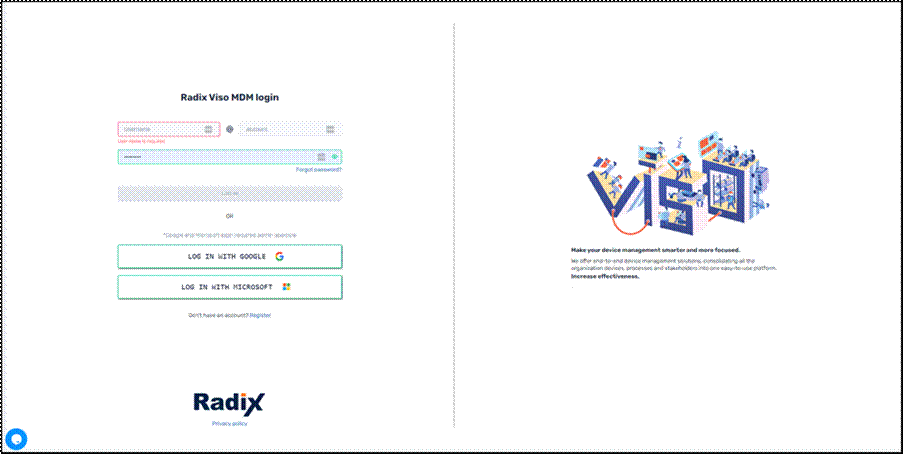
Position of the domain name in the Radix MDM login screen
- Work offline: If you select to display a URL as your View, checking this option will allow the device to continue to display the URL even if the remote device is offline.
- Show offline message: When you check the Work offline checkbox, you will be able to prompt the user of the remote device that their device is presently offline, by sending them a message.

Creating a message to be displayed when a device is offline
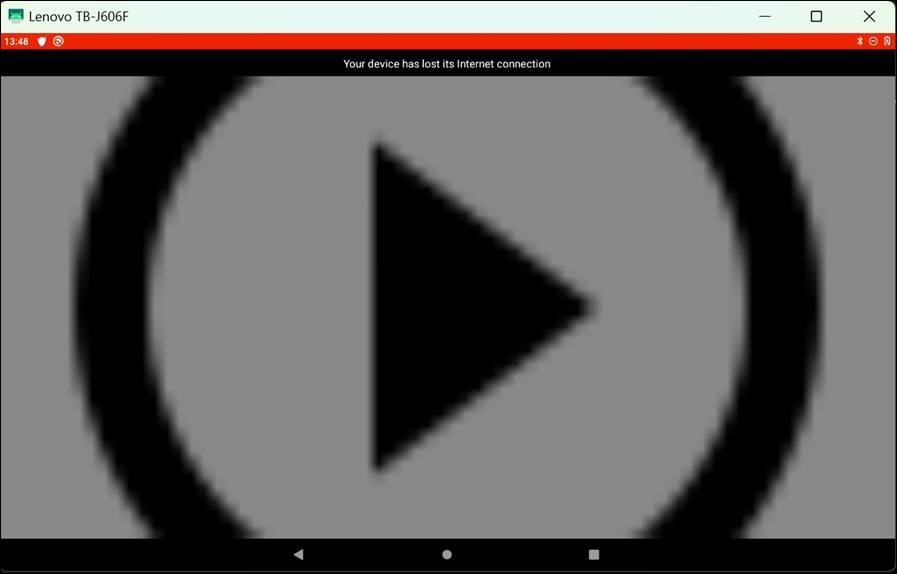
Message displayed when the device is offline
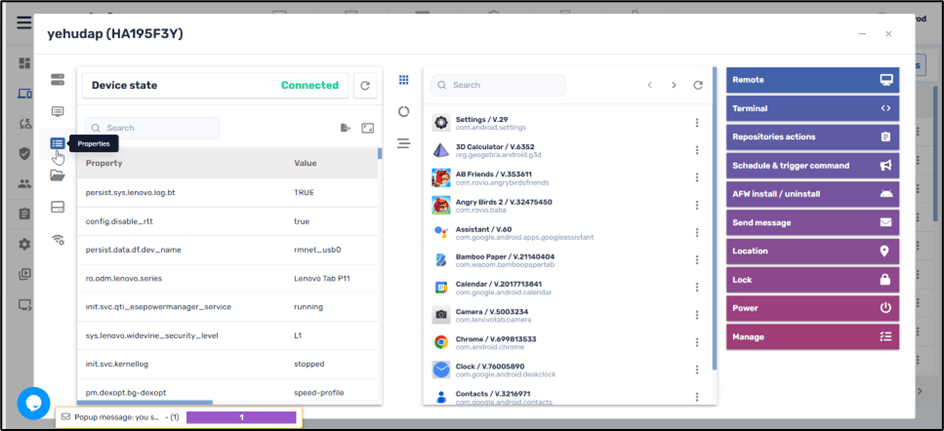
1. Click on the Whitelist tab and select the apps that you wish to allow in the View.
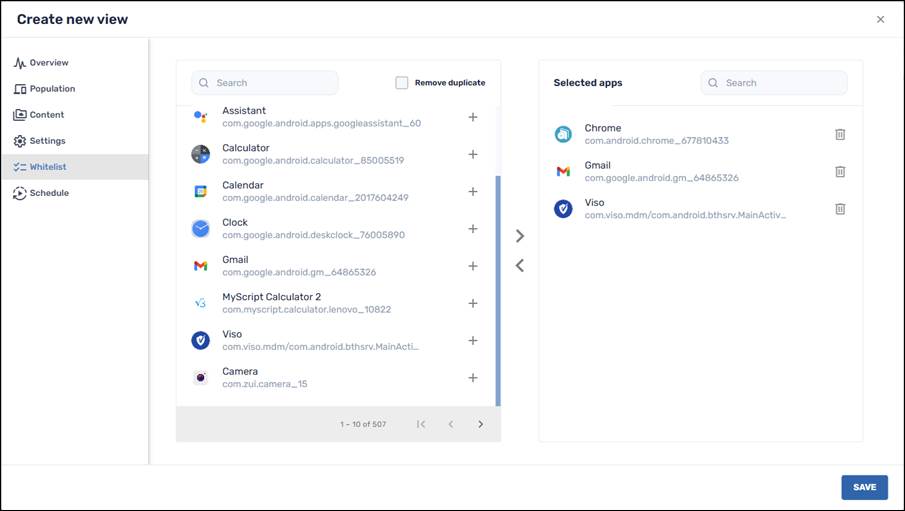
You can allow the user of the remote device to work with the selected apps via the Radix Device Manager, from the device’s Device Dashboard.
Running an App Remotely
As an example, one of the selected apps in our whitelist is the Chrome browser app. We will run Chrome on a device presently displaying the View. In our example, we will run Chrome on the device with Device ID “HA195F3Y”.
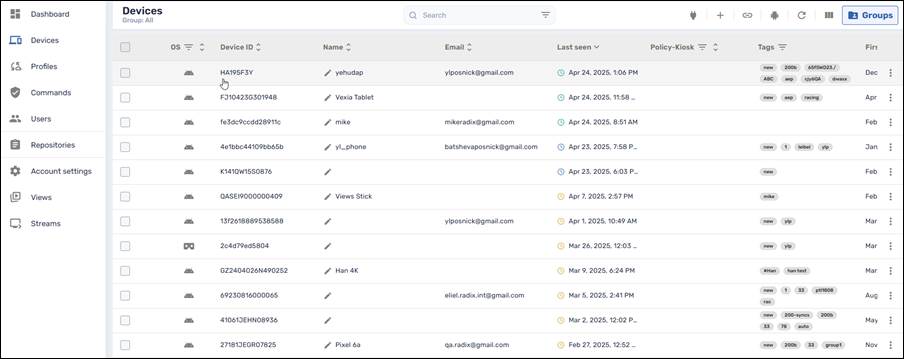
1. Click on the Devices icon in the sidebar menu to open the Devices Console.
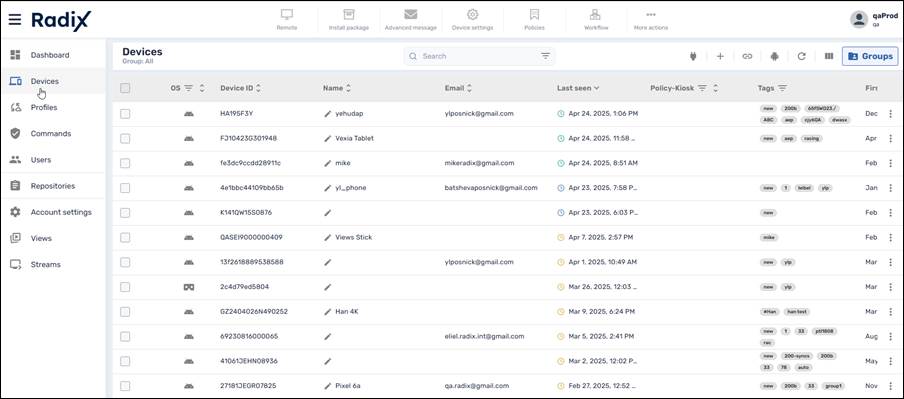
2. Find the specific device in the Radix Device Manager, in the Device Console.
3. Click anywhere on the row of the device to open its Device Dashboard.
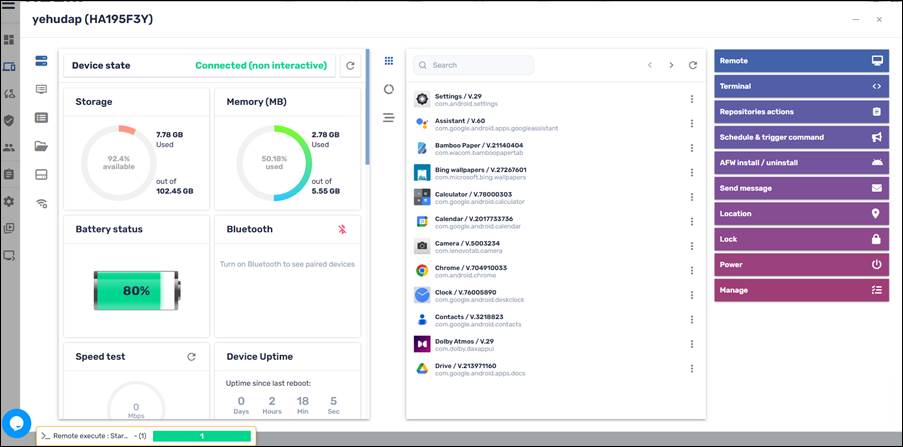
Device Dashboard of Device HA195F3Y
4. The middle pane has a list of apps currently running on the device. Find the Chrome app in the list and click on its three-dot menu.
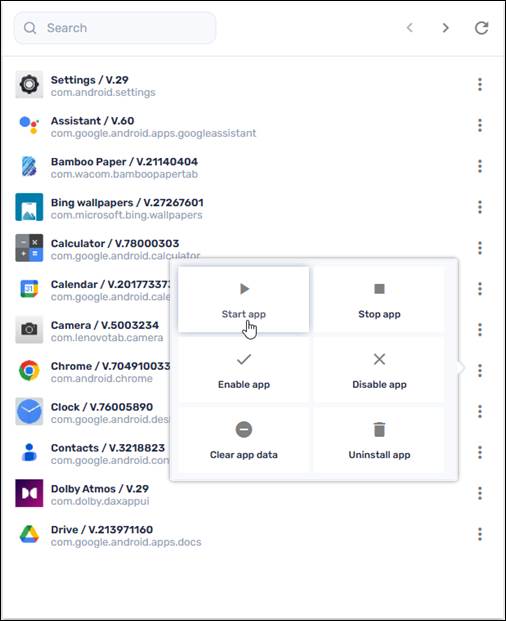
5. Click on the Start app tile to run the Chrome app. The View will stop running, and the remote user will be able to use the Chrome app instead.
6. If the remote user presses the Back, Home, or Stop buttons on their device, the device will revert to displaying the View.
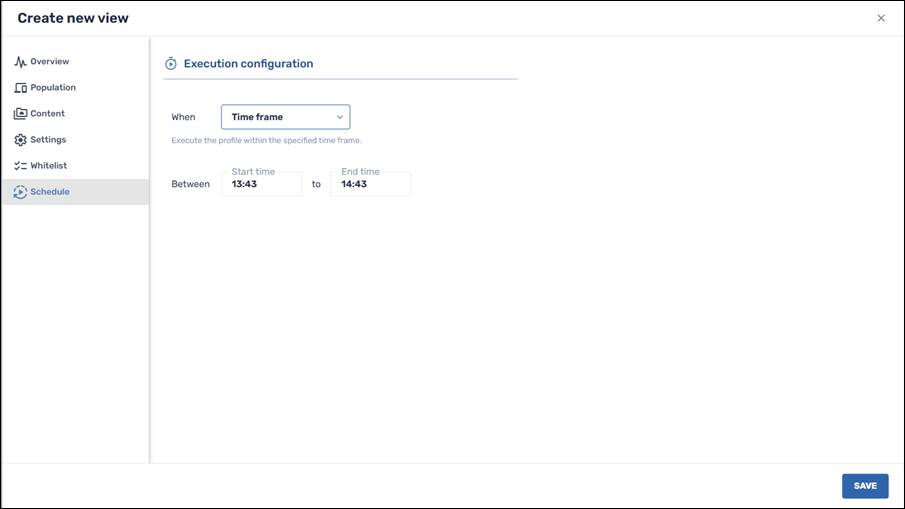
1. Click on the Schedule tab and set when you want the view to be executed. The options are:
- Immediate: To execute the view as soon as the device gets the profile.
- Over a time frame: To execute the view over a time interval, where you assign the start and end time.
2. Click Save to save the parameters for the View. It will now appear in the list of views.
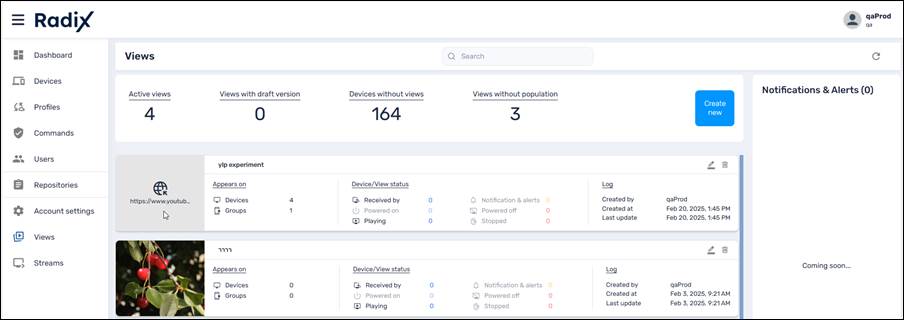
The view we have created (“ylp experiment”) appears at the top of the list