Android TV & STBs
  Interactive screens
  Digital Signage
  Information Kiosk
  Phones, Tablets, and Laptops
  Point Of Sale Devices: PoS/mPOS
  Rugged devices
  Custom devices
  Configuration Management
  Remote Support
  App Management
  Kiosk Mode
  Device Analytics
  Firmware Management
  Geo-fence and Anti-theft
  Customer Care


 TV Operators
  Hospitality
  Education
  Healthcare


The Remote Execute command allows the Radix Device Management user to execute a particular command line command or script on a device, or even on a group of devices at once. You can create Remote Execute commands and scripts to control the device settings on the remote devices in your fleet.
(Refer to the page Executing Commands Remotely for more information about the Remote Execute option.)
Creating a New Remote Execute Command
When you click on the Remote Execute tile, the Remote Execute window appears.
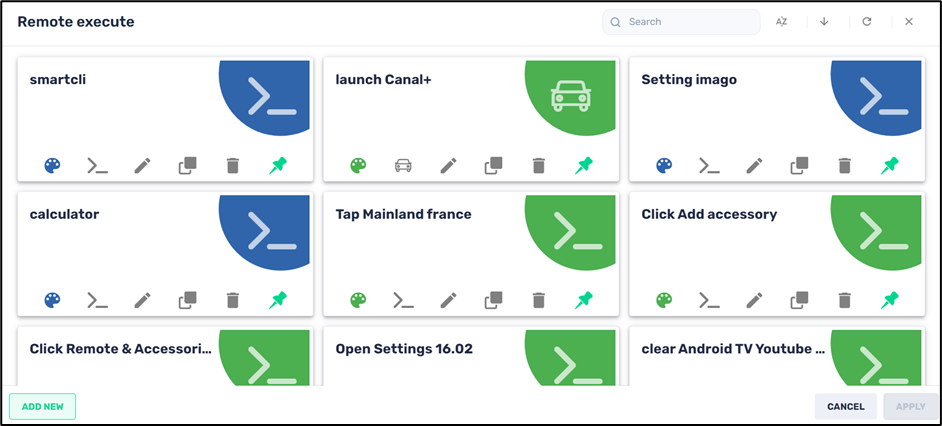
You can select one of the existing options or create a new Remote Execute command or script.
To create a new Remote Execute command:
1. Click on Add New in the Remote execute window. The New Remote Execution window appears.
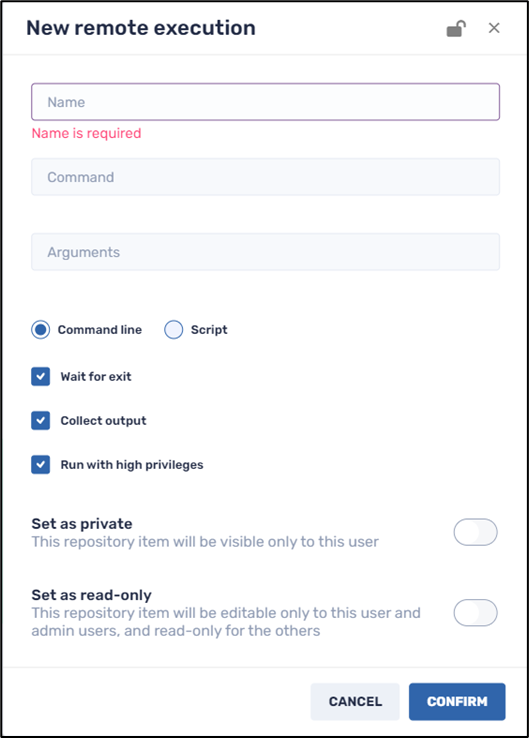
Remote execute command interface
2. Supply the command line arguments, or a script, and click Confirm. The new command will appear in the Remote Execute window.
3. Click on the Set as private button if you would like the Remote Execute option to only be visible to you (as the creator of the item) when using the Radix Device Manager.
4. Click on the Set as read-only button if you would like to limit who will be able to edit the details of the Remote Execute command. Anyone with Administrator privileges can edit it, while someone with only User privileges can only access it and use it but cannot edit it. When you click on Set as read-only, you will see the lock icon at the top of the screen turn to a “locked” position.
5. Select the command and click Apply. The command will be sent to the selected device.
Examples of Remote Execute Commands
Let us perform some simple examples of commands we send remotely to a device to modify its settings.
Example No. 1: Top Command
We will illustrate the remote execute command with the Android command “top”. The “top” command will get a list of processes running on the remote device and display the result.
To use the Remote Execute command “top”:
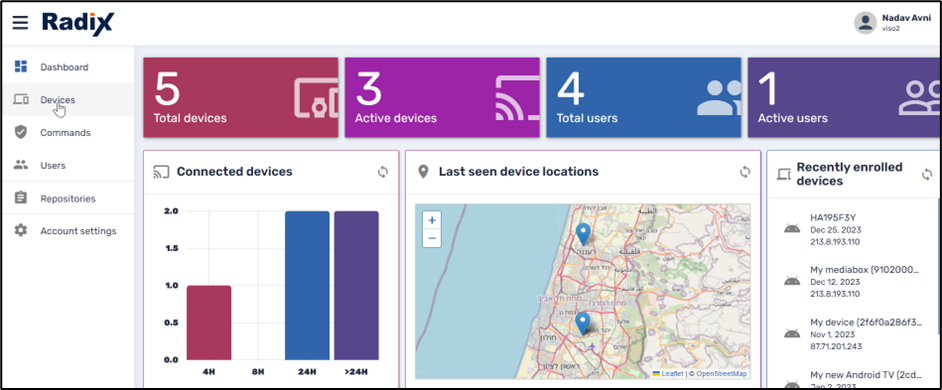
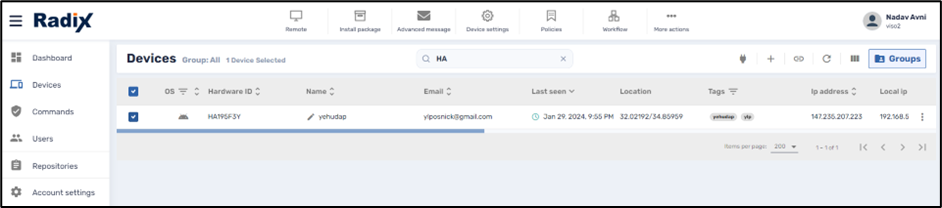
1. From the Overview Dashboard, click on the Devices Console icon, to see a list of all the available devices.
2. Find the device to which you would like to execute the command. Use the Search Bar at the top, to narrow down the selection.

3. In the list of devices, click on the device’s checkbox at the beginning of the line where the device is listed. The Devices Console Ribbon at the top of the screen will become active.
4. Click on the More Actions icon in the ribbon at the top of the Devices Console page. A drop-down list of possible commands opens.
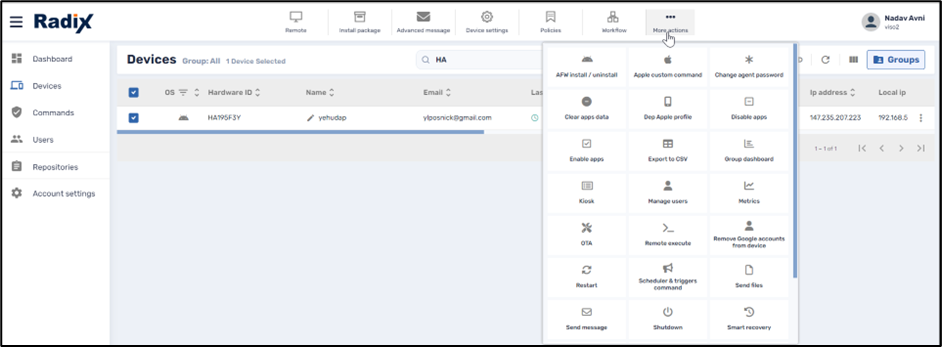
5. Select Remote Execute. The Remote Execute Commands window opens.
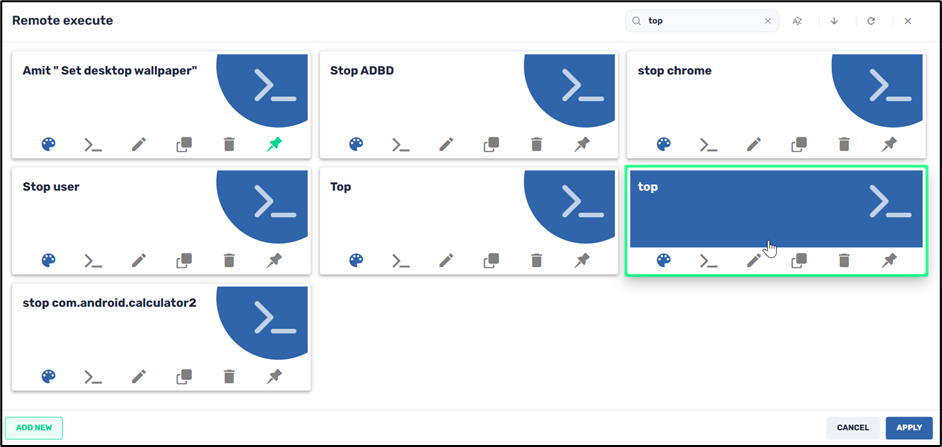
6. In the Search bar at the top of the window, enter “top,” to find the “top” command (the second entry in the table above).
This is what the “top” command looks like “under the hood” when we click on the Edit icon on the Remote Execute tile:
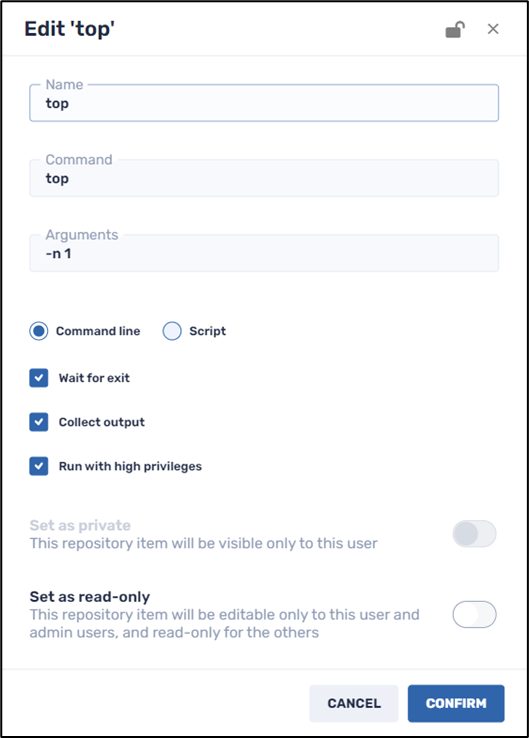
(The argument -n 1 displays 1 line in the list of apps currently running.)
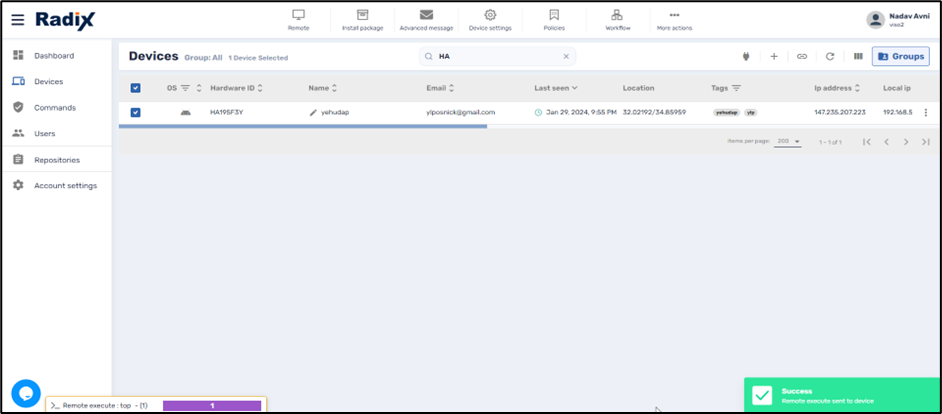
7. Click on the tile for the “top” command and click Apply.

You will get an alert in the lower left-hand corner, indicating that the command has been executed.
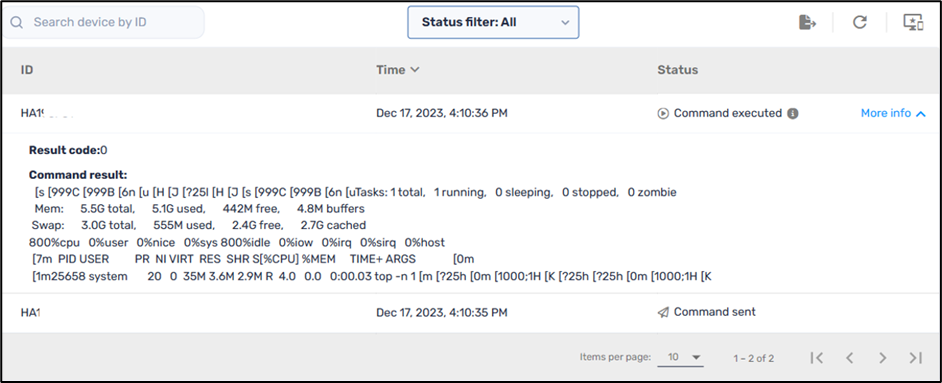
When you click on the Remote Execute command in the lower left-hand corner, the Command Status window opens. It displays the result when executing the “top” command:
Example No. 2: Set System Settings
Another useful example is adjusting a device’s system settings using a remote execute command. The syntax is as follows:
Syntax: set system <key> <value>
Here, we use the argument screen_off_timeout, which sets how long a device’s display will remain lit until it goes to sleep.
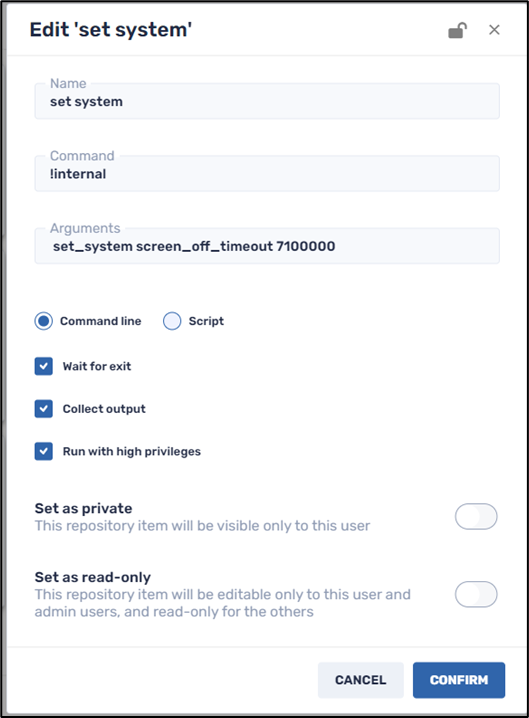
You can fill out the fields with the following parameters:
- Command: !internal (the “!internal” command helps ensure that the user has sufficient permissions to execute the command)
- Arguments: set_system screen_off_timeout 7100000
In this example, the command will set how long the screen on the Android device will remain lit. The argument for the amount of time the display remains lit is set for 7,100,000 milliseconds (= 118 minutes and 20 seconds).
Example No. 3: Set Global Settings
In this example, this command will turn on automatic date and time settings on the remote Android device.
Syntax: set_global <key> <value>
Here, we use the argument set_global auto_time 1, to allow the Android device to set its date and time settings automatically.
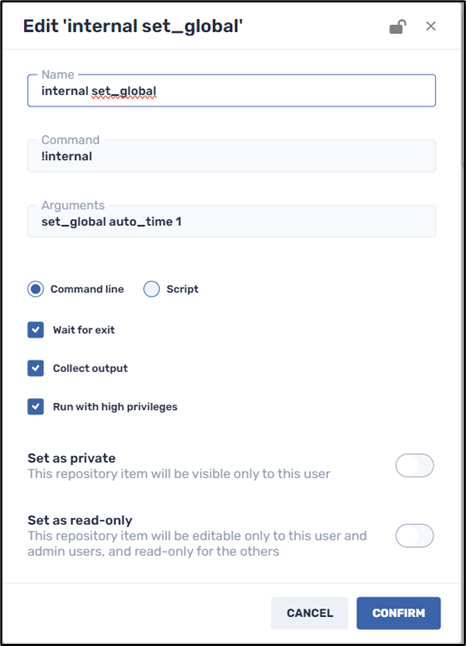
You can fill out the fields with the following parameters:
Command: !internal (as above, the “!internal” command helps ensure that the user has sufficient permissions to execute the command)
Arguments: set_global auto_time 1
Example No. 4: Set Secure Settings
In this example, we use the “secure settings” option to disallow installing apps from any unknown sources.
Syntax: set_secured <key> <value>
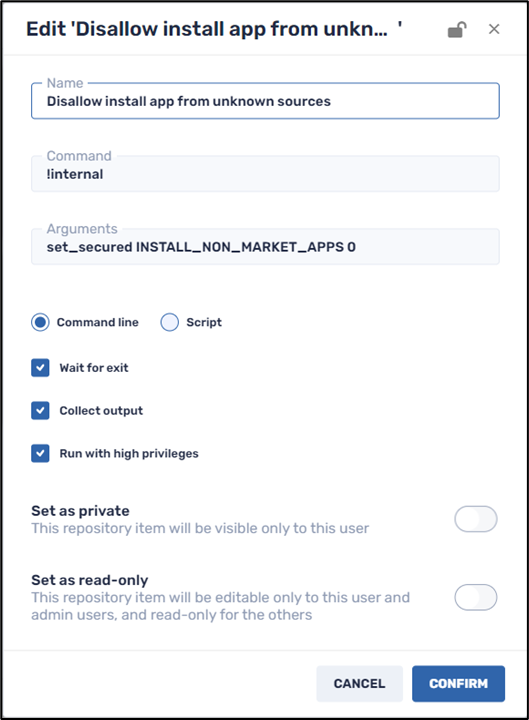
You can fill out the fields with the following parameters:
Command: !internal (as above)
Arguments: set_secured INSTALL_NON_MARKET_APPS 0
In this example, we employ the argument “INSTALL_NON_MARKET_APPS” and set the parameter to “0”, to disallow installing apps from suspicious sites.
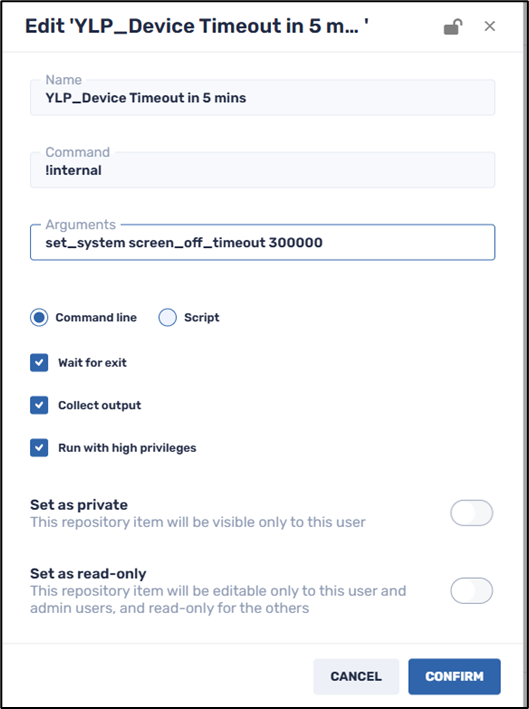
Example No. 5: Set Device Timeout Time
In this example, we set the device timeout time. We chose to turn the device’s display off if the device is inactive for 5 minutes. The argument for the command is in milliseconds. Thus, 300,000 milliseconds = 300 seconds = 5 minutes.
Command: !internal (as above)
Arguments: set_system screen_off_timeout 300000
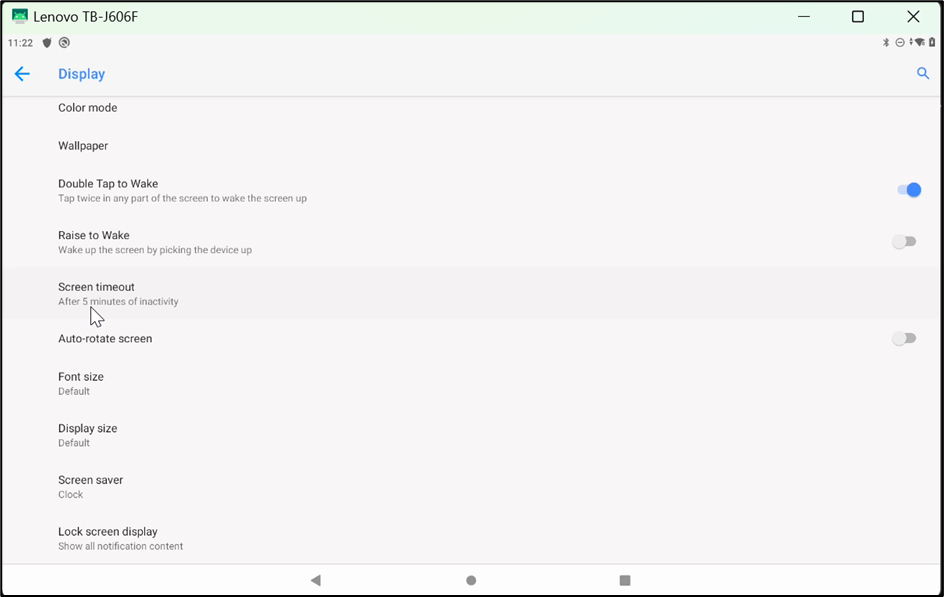
The display settings on the remote device will reflect the change:
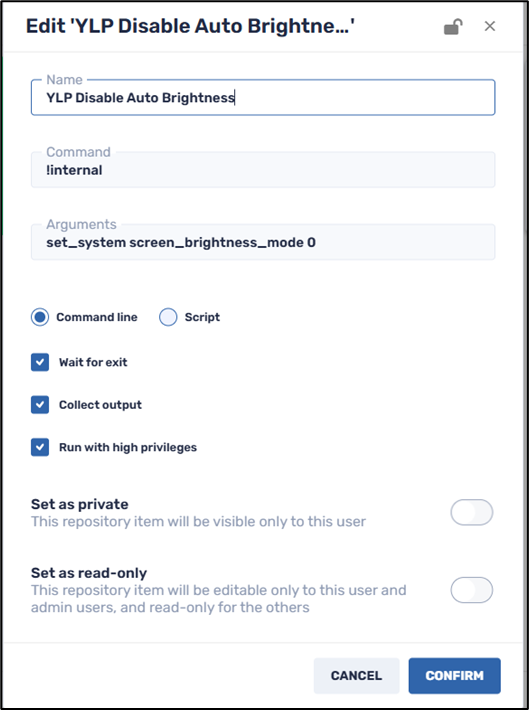
Example No. 6: Disable Auto Brightness
In this example, we disable the auto-brightness feature on the device. If you choose to enable auto-brightness, that means that the screen brightness will automatically adjust to the surroundings.
Command: !internal (as above)
Arguments: set_system screen_brightness_mode 0
“0” turns off brightness mode, while “1” turns it on.
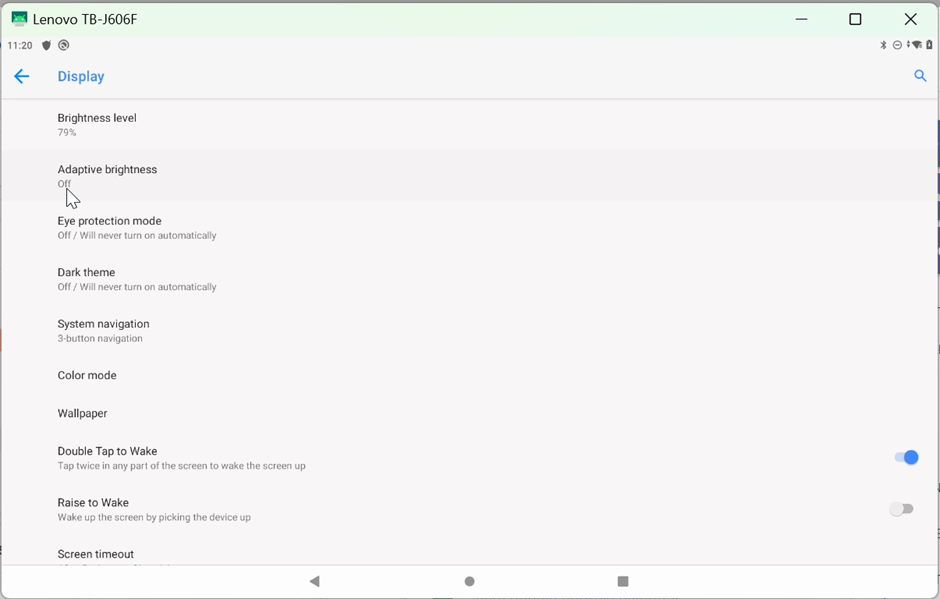
When you implement this setting, the Adaptive Brightness setting on the remote device is turned “off”:
Example No. 7: Auto Rotation
This remote execute command enables or disables the display to rotate automatically when you change the orientation of the device.
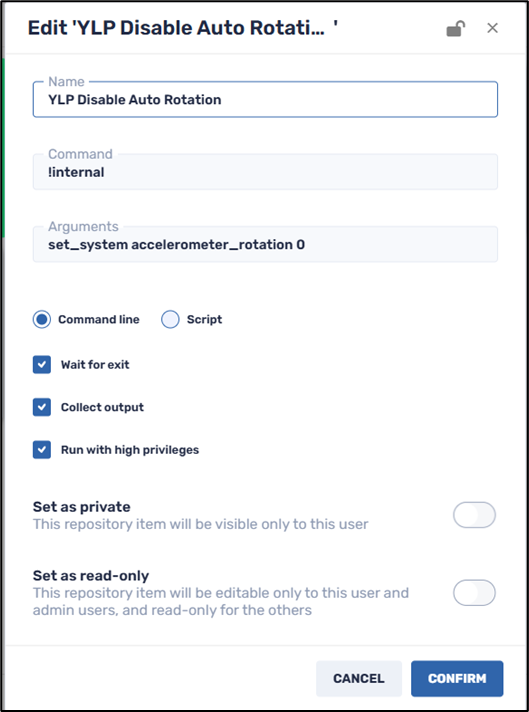
Command: !internal (as above)
Arguments: set_system accelerometer_rotation 0
“0” turns off the auto-rotation feature, while “1” turns it on.
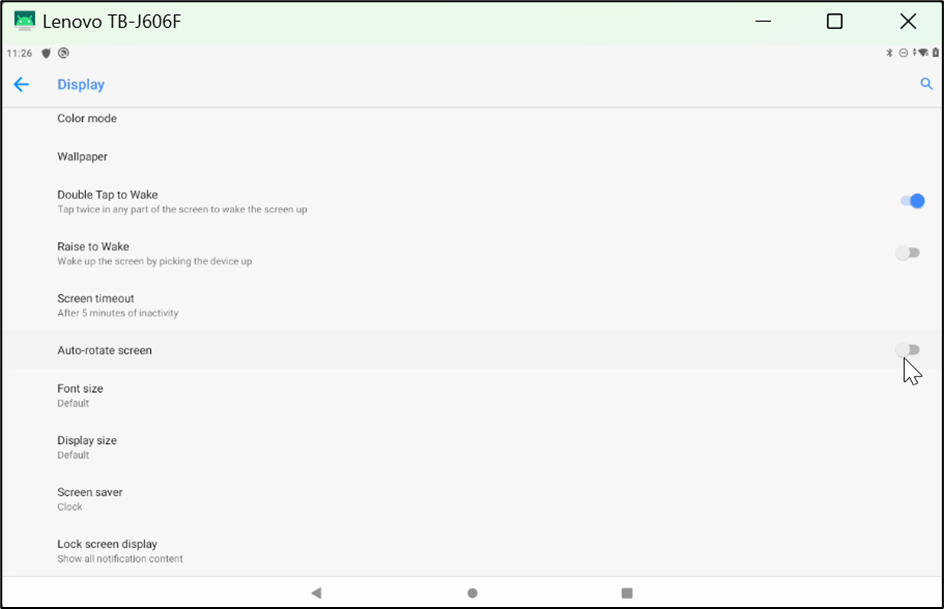
The device’s display settings will show this change as well. The auto-rotate setting will now be turned off:
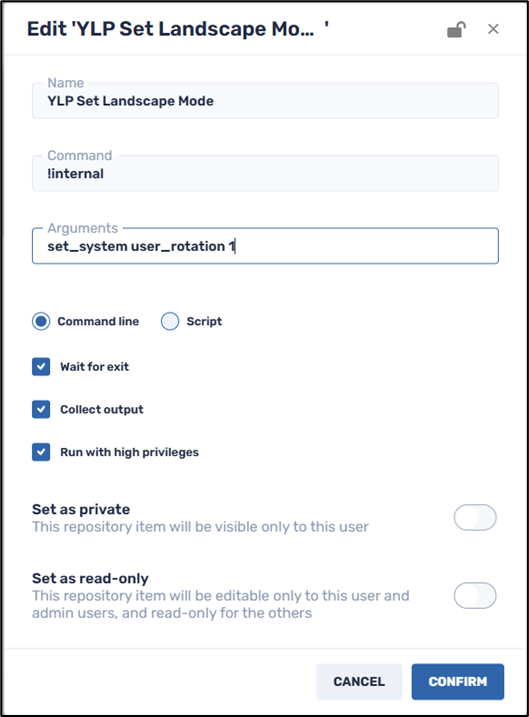
Example No. 8: Set Landscape Mode
This changes the orientation of the display on the remote device to portrait or landscape mode.
Note: In order to use this command, you must disable the auto-rotate feature using the set_system accelerometer_rotation 0 command we saw previously.
The parameters are the numbers 0, 1, 2, and 3.
- Setting 0 rotates the display to Portrait mode.

- Setting 1 rotates the display 90° clockwise from Setting 0.
- Setting 2 rotates the display 180° from Setting 0.
- Setting 3 rotates the display 270° clockwise from Setting 0.
Command: !internal (as above)
Arguments: set_system user_rotation 1