Android TV & STBs
  Interactive screens
  Digital Signage
  Information Kiosk
  Phones, Tablets, and Laptops
  Point Of Sale Devices: PoS/mPOS
  Rugged devices
  Custom devices
  Configuration Management
  Remote Support
  App Management
  Kiosk Mode
  Device Analytics
  Firmware Management
  Geo-fence and Anti-theft
  Customer Care


 TV Operators
  Hospitality
  Education
  Healthcare


Tags are identifiers that you can assign to users or devices. There are two scenarios in which you can apply tags:
Applying tags to a user: By assigning tags to a user, the user will be able to see only devices with the corresponding tags. The devices must contain all of the tags that the user has, in order for the devices to appear in the list of the user’s devices.
Applying tags to devices: By assigning tags to devices, you can create a group of devices. You can then perform commands (send messages, send files, perform updates, etc.) on a group, and these commands will be executed on all of the devices in the group.
We will examine these options in turn.
Applying Tags to Users
An administrator will have the ability to assign tags to a Radix Device Manager user.
To assign tags to a user:
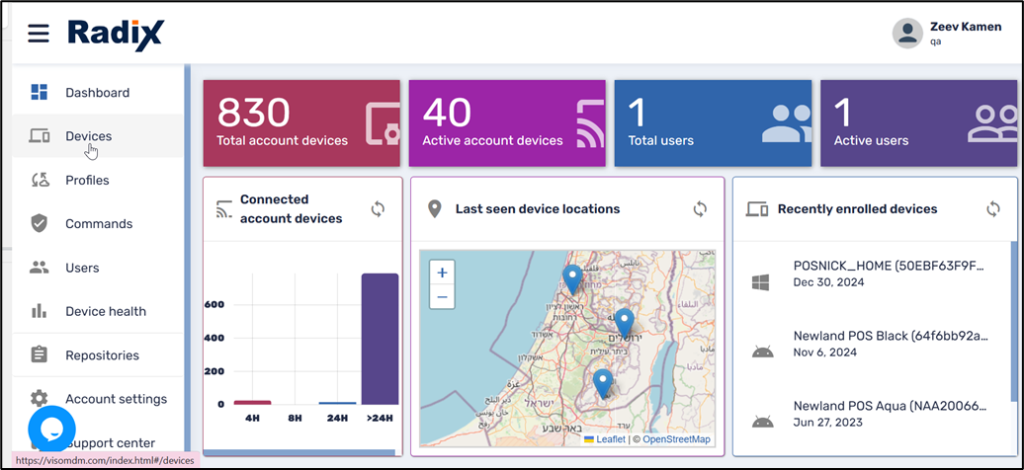
1. Click on the Users icon in the Device Dashboard.
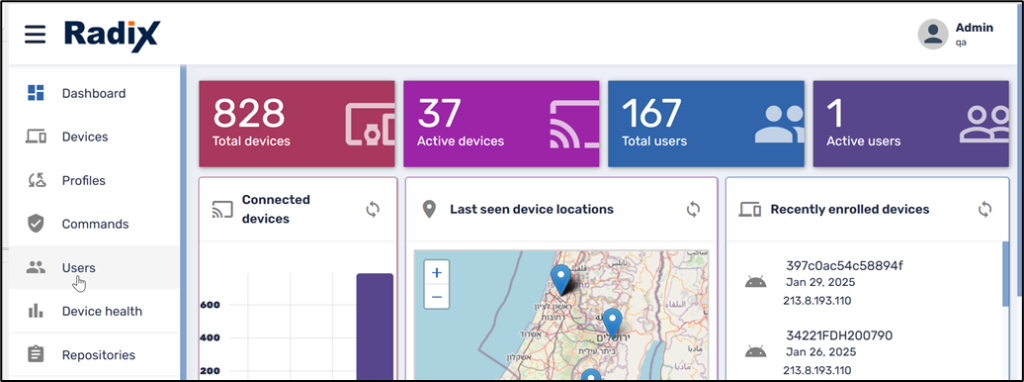
The Users Console opens.
2. Use the Search bar to find the specific user to whom you wish to apply tags. In our example, we have located the user, Zeev Kamen.
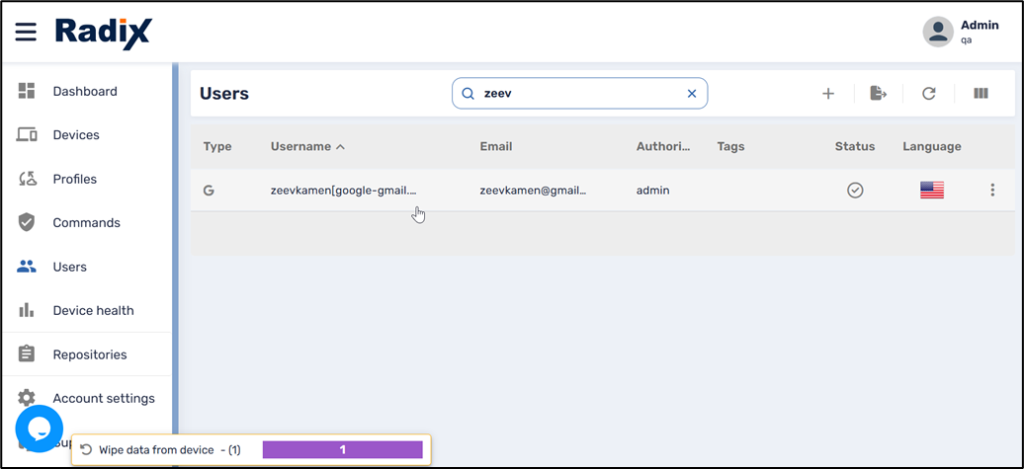
3. When we click on the row of that user, the User Profile screen opens.
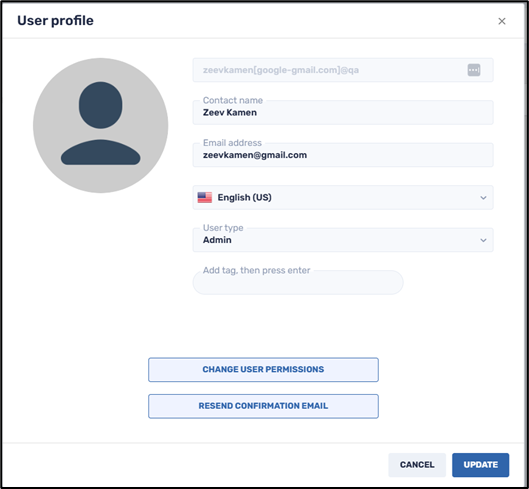
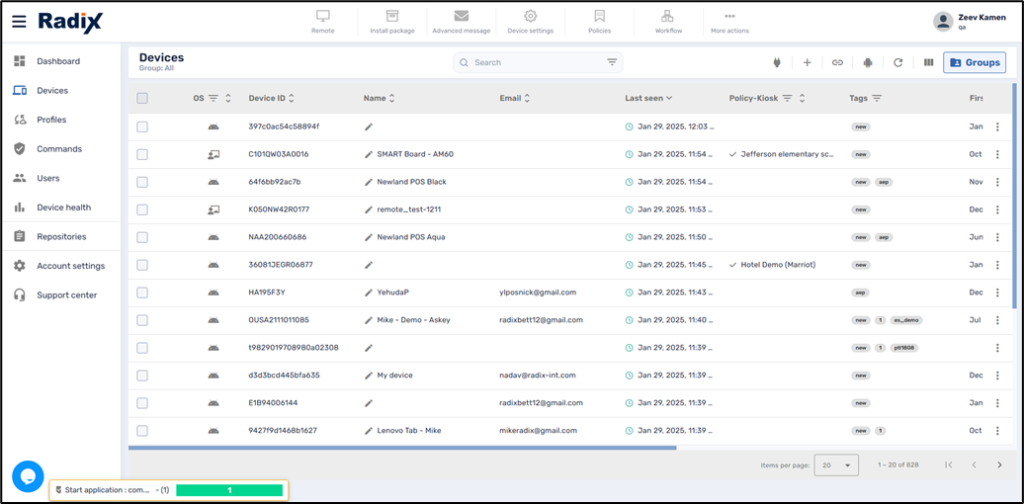
At present, this user does not have any tags assigned. When Zeev looks at the devices enrolled in his account, he will see all of the devices:
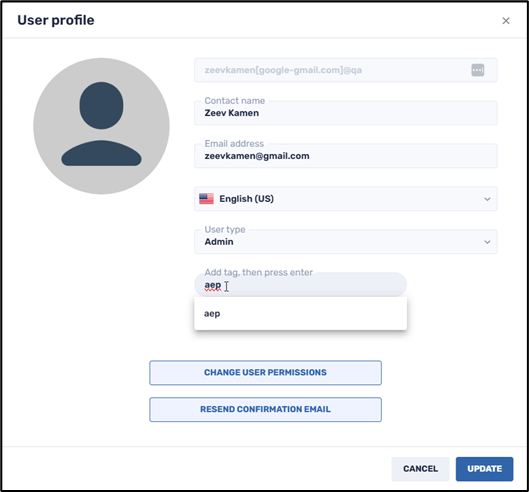
4. If the administrator assigns a tag to Zeev’s account, Zeev will only be able to view the devices that also have this specific tag assigned to them. To assign a tag, type the name of the tag in the textbox, and press Enter. In our example below, we assigned the tag “aep” to Zeev.
5. Click Update to confirm the change to Zeev’s user profile.
When Zeev now clicks on Devices in the Radix Device Manager, he will only see the devices with the tag “aep”. Thus, Zeev only sees 5 devices in his list.
We see that some of the devices have the tag “aep”, as well as another tag.
Effect of Adding More Tags to a User
If the administrator assigns another tag to Zeev’s profile, that will further restrict the number of devices that Zeev will be able to see in his account to only the devices with both of these tags.
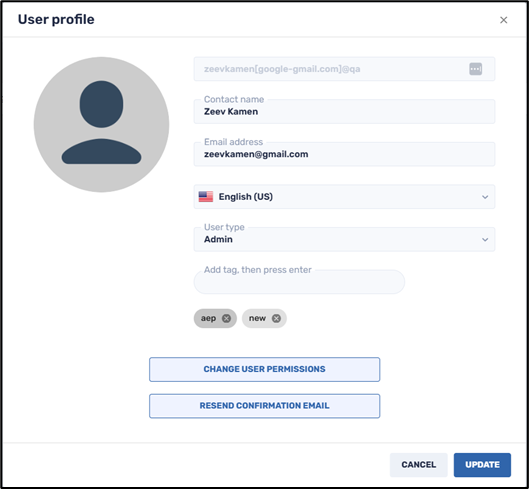
We will add the tag “new” to Zeev’s profile.
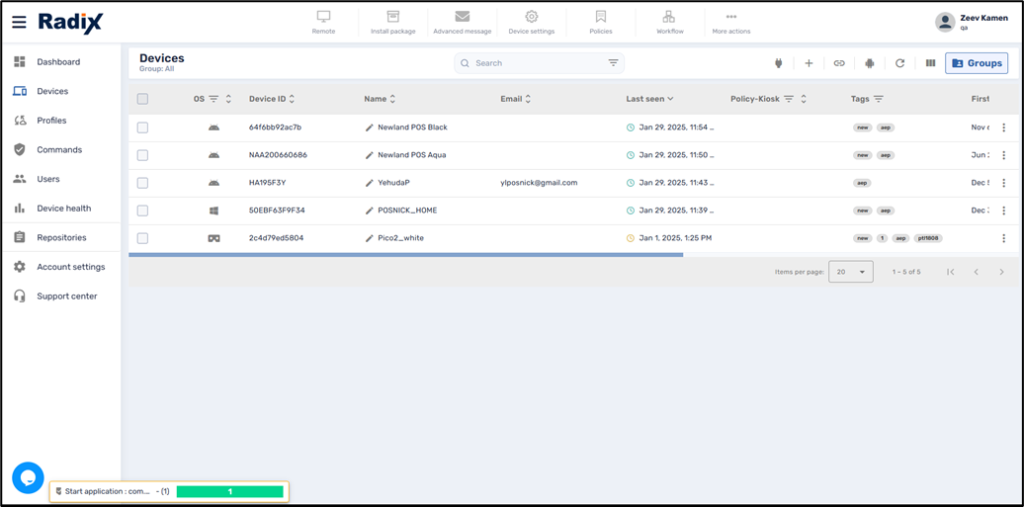
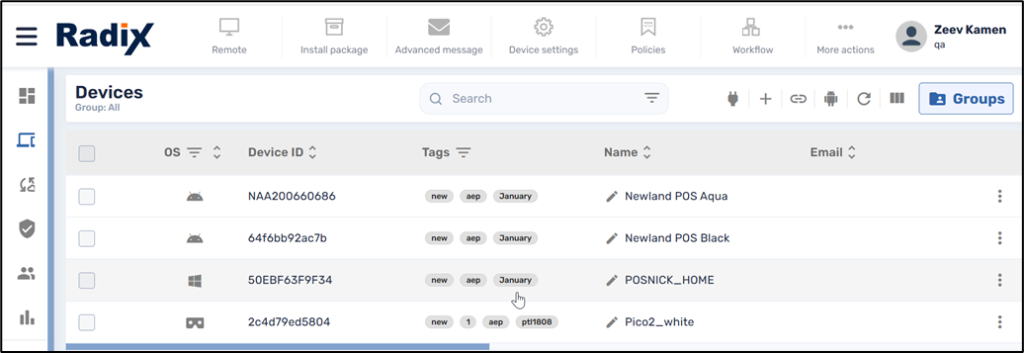
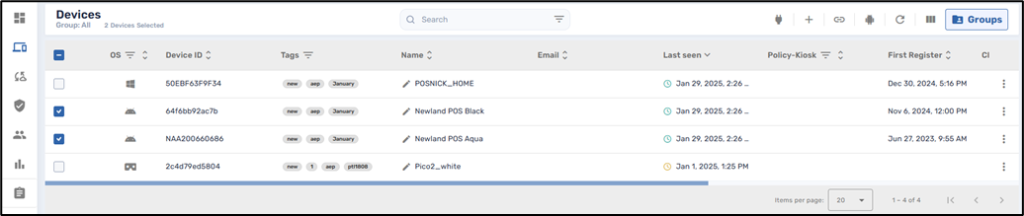
When Zeev looks at the list of devices in the Devices console, he will only see four devices (those devices with both tags “aep” and “new”:

Note that the VR device “Pico2_white” has additional tags (“1”, and “ptl1808”). Nonetheless, Zeev can still view this device and send commands to it, since the device has been assigned the tags that Zeev has.
Applying Tags to Devices
As we have seen, assigning tags to devices will limit the devices that a Radix Device Manager user will be able to control. The user will be able to only view those devices that have all of the tags that have been assigned to that user.
Another use of tags is to create a device group. You can also create a group of devices by assigning a tag to several devices.
To add a tag to a device:
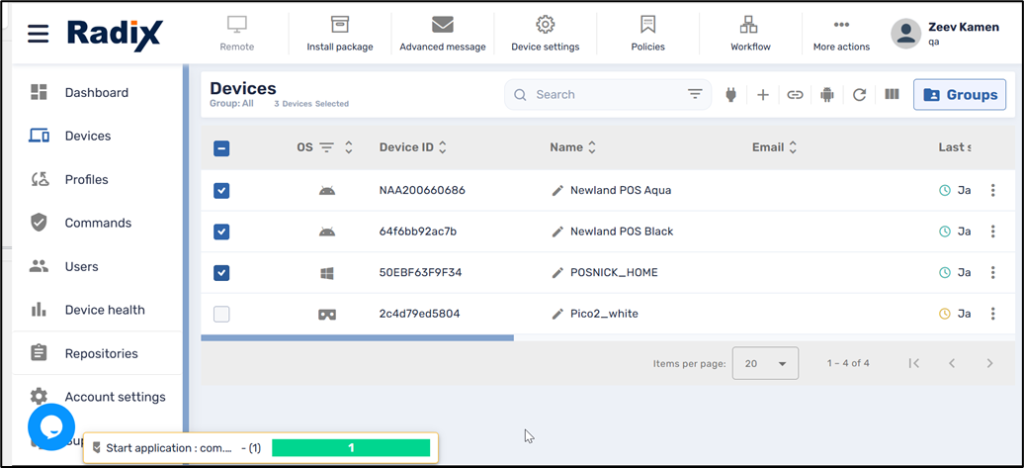
1. In the Radix Device Manager, click on the Devices icon in the side panel to open the Devices Console.
2. Select a device, or several devices, by checking their checkbox in the far-left column. In the example below, we selected three of the four devices in Zeev’s Device Console.
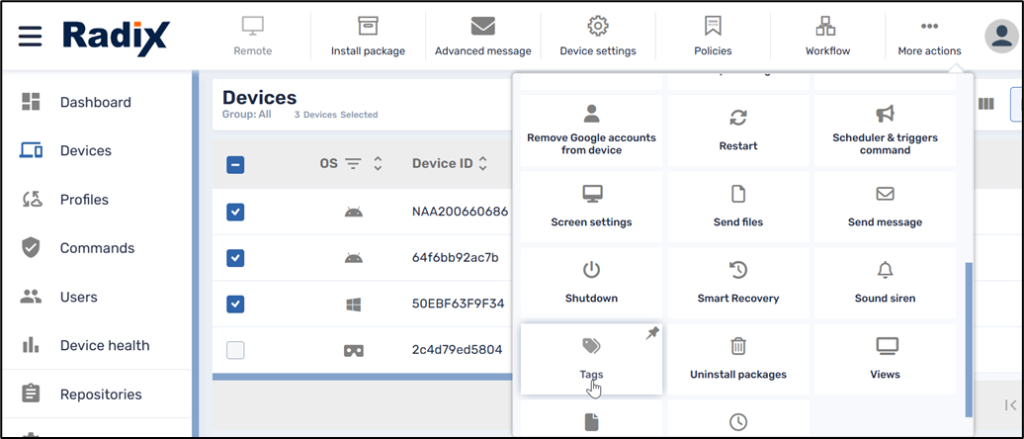
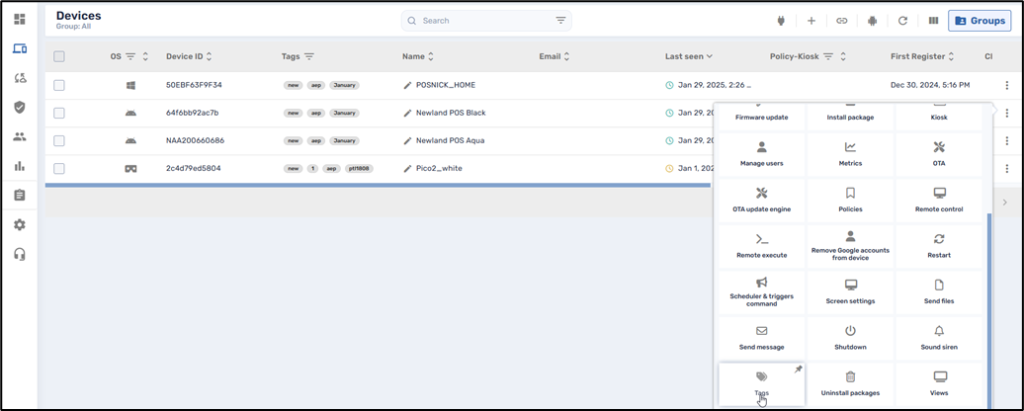
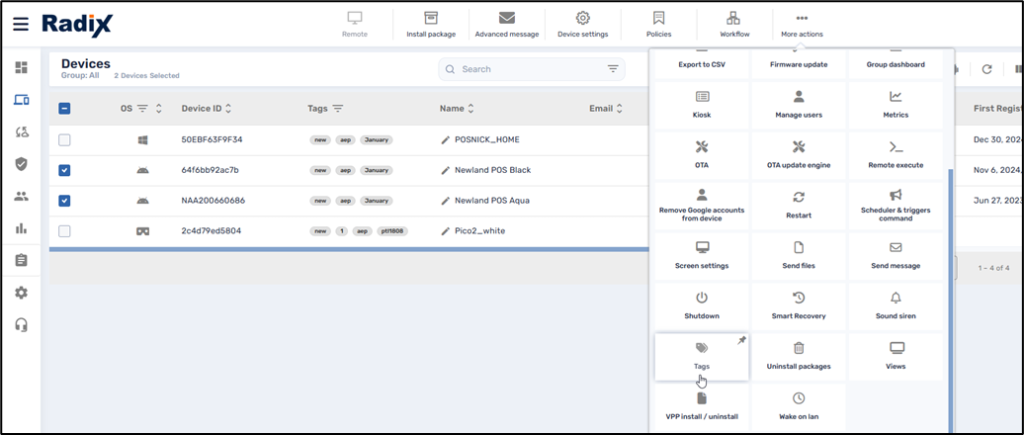
3. Click on More Actions in the Devices Console Ribbon and select the Tags tile.
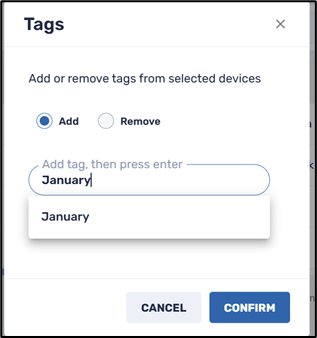
4. Enter the name of the tag that you want to apply to these devices, click Enter, and press Confirm. You can add several tags this way. In the example below, we add the tag “January” to the three selected devices.
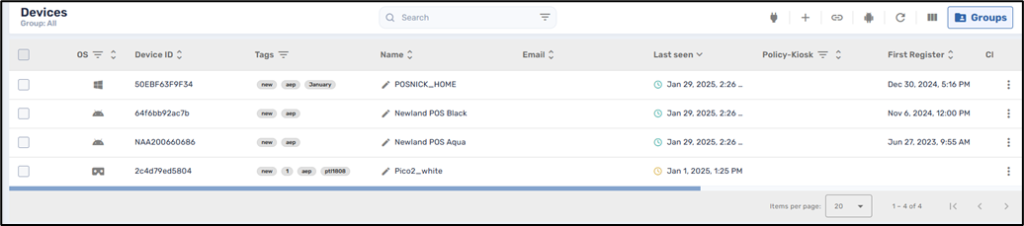
5. If we refresh the browser and look at the list of devices, we see that the tag “January” has been added to the three selected devices.
Creating a Device Group
If we wish to group the devices with the same tag, we have to create a group. (There is additional information about device groups on the page Device Groups and Filters.)
To create a group of devices:
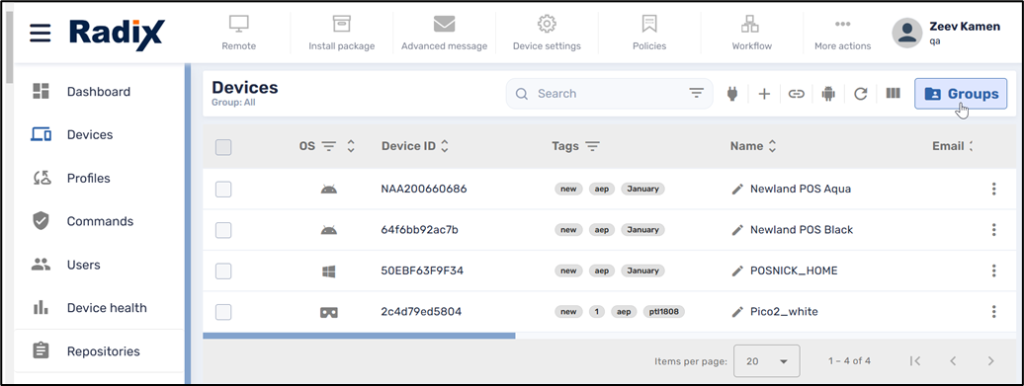
1. Click on the Devices icon in the Radix Device Manager sidebar menu.
2. In the Devices Console, click on Groups on the far right.
3. In the Groups window, click on the Add new group icon.
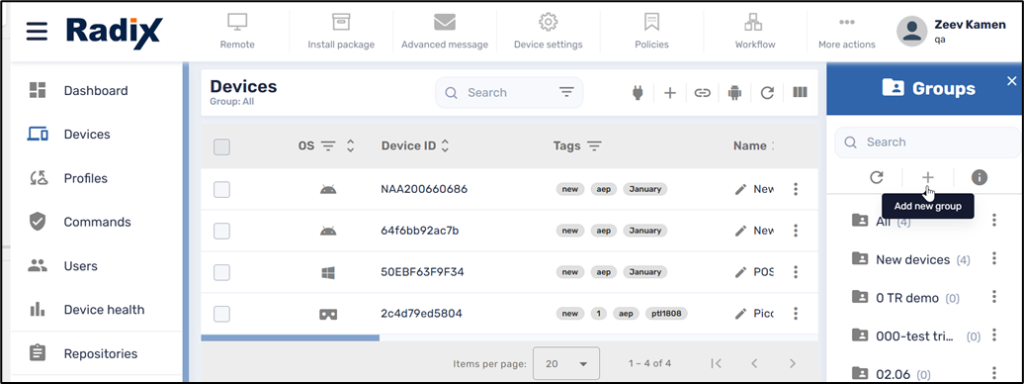
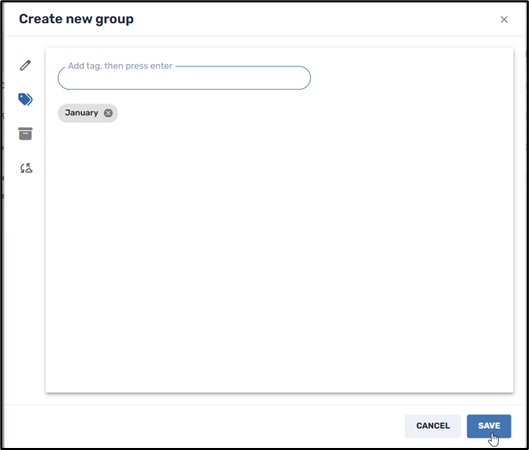
The Create new group window opens.
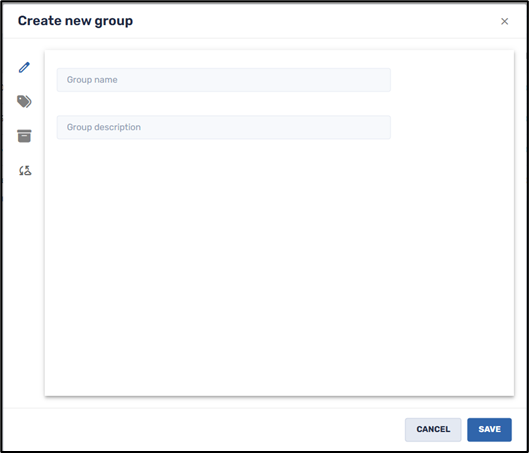
4. Assign a name and description to the group. We will call ours “January_group”.

Assigning Tags to a Group
5. Click on the Tags icon in the sidebar menu. A window opens allowing you to assign tags to your group.

6. Add the tag “January” and click Save. This will associate any devices with the tag “January” with our new group.
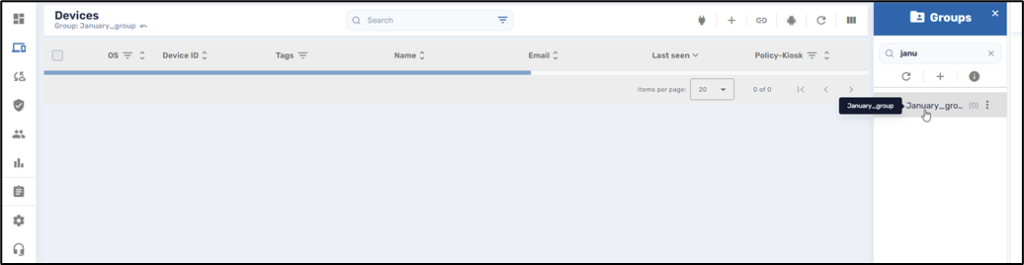
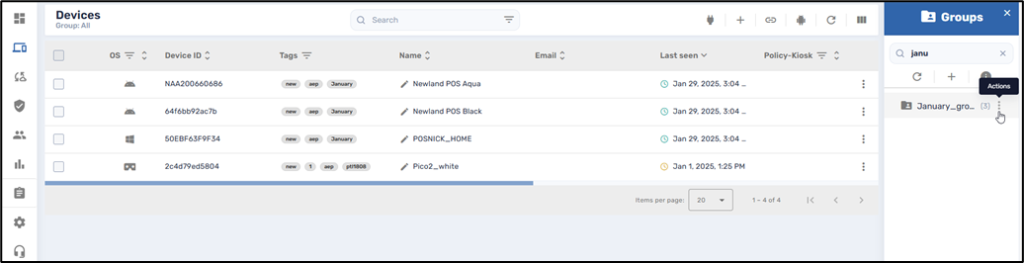
7. If we now search for the group January_group in the Groups window, we will find the new group that we have created.
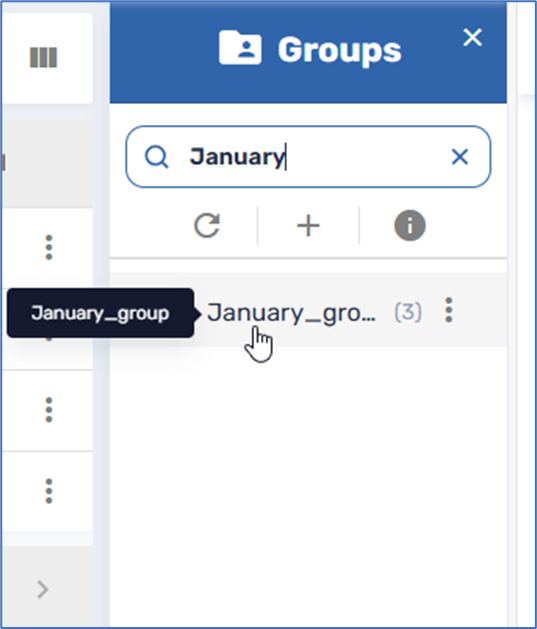
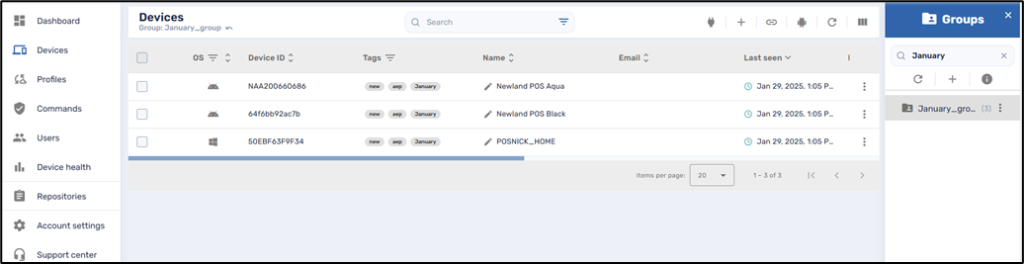
8. Click on the group name. The Devices Console will display the three devices in “January_group”.
Sending a Command to a Group
Once we have created a group, we can send a command to all of the devices in that group. We will illustrate this with the “Send Message” command.
To send a command to a group:
1. Click on the Devices icon in the Device Manager sidebar menu to open the Devices Console.
2. Click on Groups in the far right to open the Groups window.
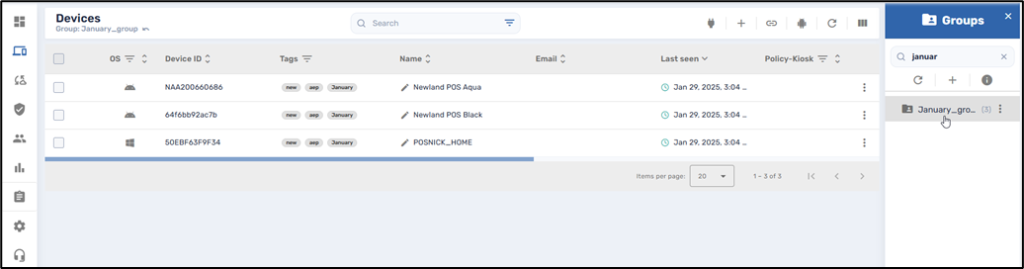
3. Use the Search bar to find the group to which you wish to send the command. We will apply our command to the January_group devices.
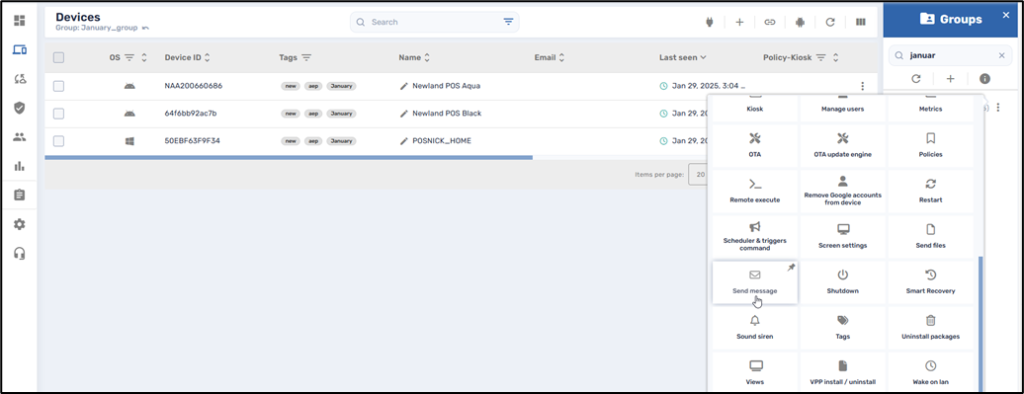
4. Click on the three-dots menu next to the group name and select the desired command (in our case, “Send message”).
5. Enter the parameters for the message and click Confirm.
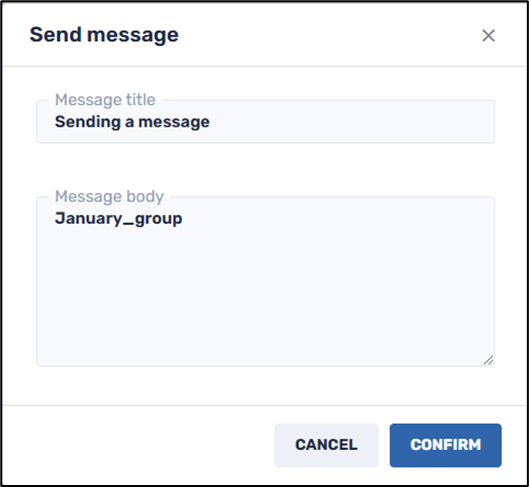
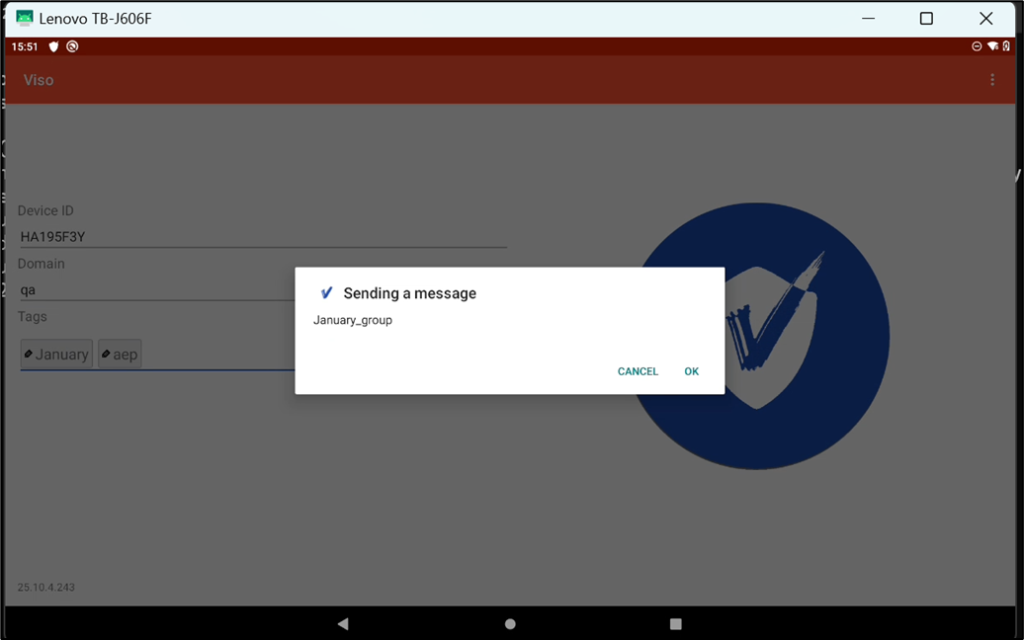
The devices in the group will receive the message.
Deleting a Tag
To delete a tag, we select the device which contains the tag and select the Remove option. We can also delete tags from several devices at once, or from all of the devices in a group.
Deleting a tag from an individual device:
To remove a tag from an individual device:
1. Click on the Devices icon in the sidebar menu, to open the Devices console.
2. Select the device from which you would like to delete a tag.
3. Click on the Tags command. In the example below, we will delete a tag from the device Newland POS Black.
4. If you wish to delete a tag, click on the ![]() icon on the tag. In the example below, we will delete the January tag from the device.
icon on the tag. In the example below, we will delete the January tag from the device.
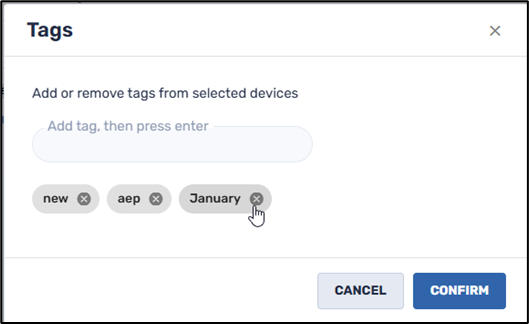
5. Click Confirm. The tag is removed from the device.

If we look at January_group, we see that only two devices remain in the group.

Deleting a tag from several devices
We can also delete a tag from several devices, by checking their checkboxes and using the Device Console Ribbon at the top of the Radix Device Manager.
To delete a tag from several devices:
1. Click on the Devices icon in the Radix Device Manager to open the Devices Console.
2. Click on the check boxes of the devices from which you wish to remove tags. In our example below, we will remove tags from the devices “Newland POS Black” and “Newland POS Aqua”.
3. Click on More Actions in the Device Console ribbon at the top of the page and select Tags.
4. Enter the name of the tag that you wish to delete, click Enter, and then Confirm. In the example below, we will remove the “January” tag from the two devices we have selected.
When we refresh our browser, we will see that the two devices no longer have the “January” tag.
Deleting a tag from a group of devices
We can also use commands on an entire group and delete tags from all of the devices in the group.
To delete a tag from all of the devices in a group:
1. Click on the Devices icon in the sidebar menu to open the Devices console.
2. Click on Groups on the far right to open the Groups window.
3. Find the group from which you wish to remove a tag. In our example, we will remove the tag “January” from the devices in “January_group”.
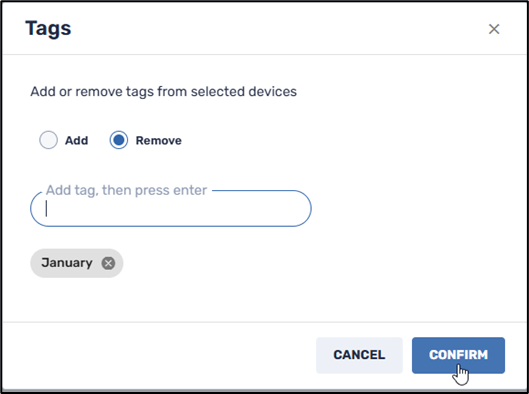
4. Click on the three-dots menu to display the actions that you can perform on the group and select Tags.
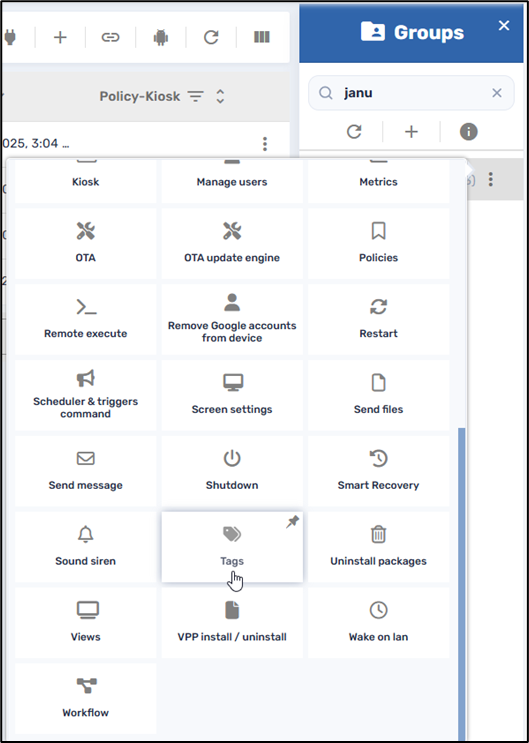
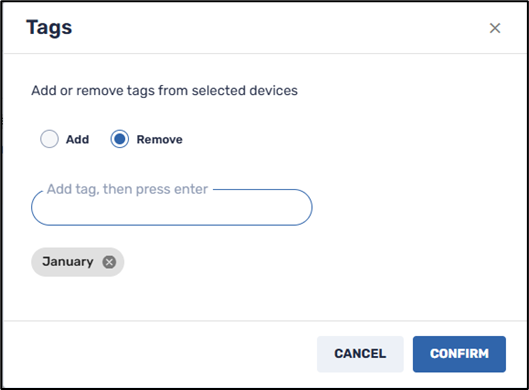
5. Select Remove to remove a tag.
6. Enter the name of the tag that you wish to delete, click Enter, and click Confirm to delete the tag from the devices in the group.
Since we have deleted the tag “January” from all devices in “January_group”, the group will now be empty of any devices: