Android TV & STBs
  Interactive screens
  Digital Signage
  Information Kiosk
  Phones, Tablets, and Laptops
  Point Of Sale Devices: PoS/mPOS
  Rugged devices
  Custom devices
  Configuration Management
  Remote Support
  App Management
  Kiosk Mode
  Device Analytics
  Firmware Management
  Geo-fence and Anti-theft
  Customer Care


 TV Operators
  Hospitality
  Education
  Healthcare


The Repositories items allow you to create and/or store software packages, scripts, device settings, workflows of commands, and more. Once you create items in these repositories and store them in the Radix Device Management system, you can access them later and apply them to selected devices elsewhere in the Radix Device Management interface. This is a brief guide to each of the repository items that are available in the Radix Device Manager.
Table of Contents
Overview
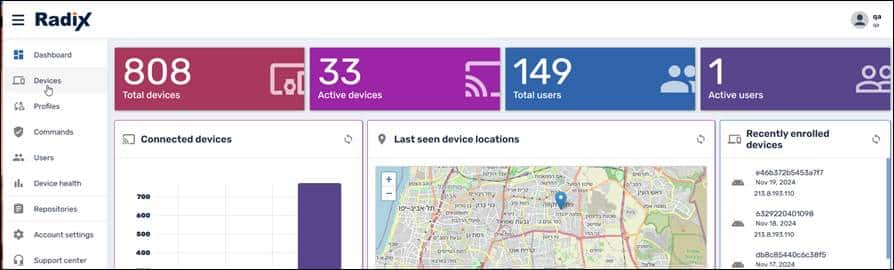
When you first log in to the Radix Device Manager, you will see Repositories as one of the items in the sidebar menu. When you select the Repositories icon in the Radix Device Management Dashboard, the grid of Repository options is displayed.
Grid of the Repositories Options
Summary of Repository Items
Here is a guide that summarizes the Repository items options. By default, most of these Repository items are available for use on Android devices, unless they are specifically for a Windows or Apple/iOS device.

Software Packages
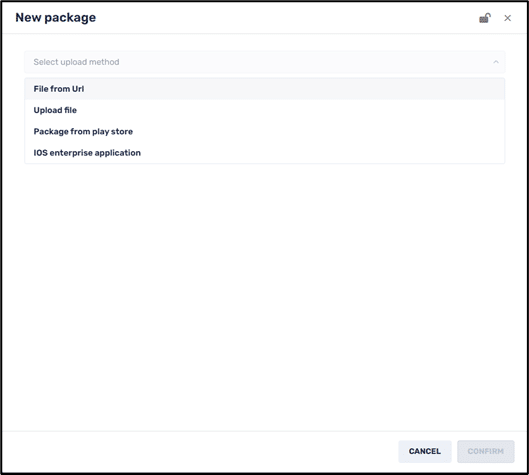
This allows you to upload a software package from a URL, a file on your computer, a package from the Google Play Store, or an iOS enterprise application. (The user of the device may have to complete the installation.)
Policies
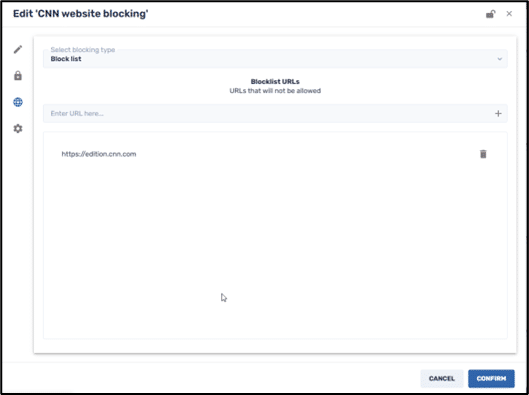
This option allows you to create and apply a software policy to a device, blocking certain apps or software packages that either cause performance problems or security problems. After selecting the operating system (Android, iOS, MacOS, Windows, and ChromeOS), you then specify which apps to block, and how to activate the policy. For example, here is a repository item that will block access to CNN on the remote devices:
Kiosk
This repository item option allows you to set up a device to be used as a display in a kiosk, such as in a storefront or hotel. You select particular apps that you want to be part of the kiosk display, as well as an appropriate background. In the Kiosk setting in the example below, intended for use in a Sheraton hotel, the device will be limited to four functions: calculator, calendar, business calendar, and the X-plore file manager.

Views
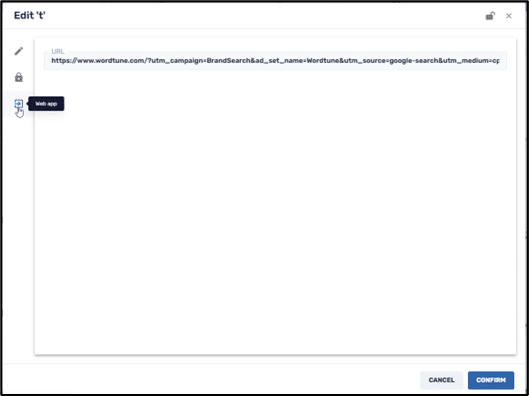
The Views repository item option is a specialized type of kiosk setting. You can specify a list of allowed apps for a remote Android device, as well as a single web app URL. For example, the web app can be a video that plays in a loop or a particular website that serves to advertise a product.
Advanced Messaging
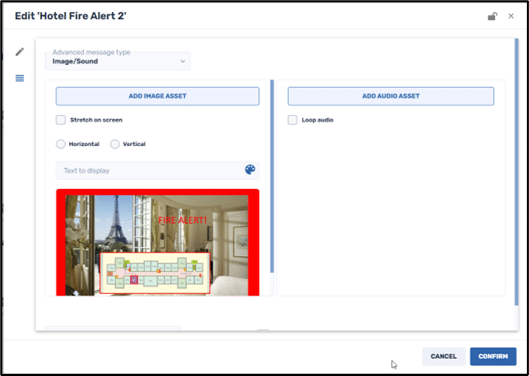
This option sends a text message with an image to a device. The message may be a “Welcome” message, a holiday greeting, or an emergency alert. In the example below, the advanced message is a map of a hotel, indicating the possible exit routes in the event of a fire.
Assets
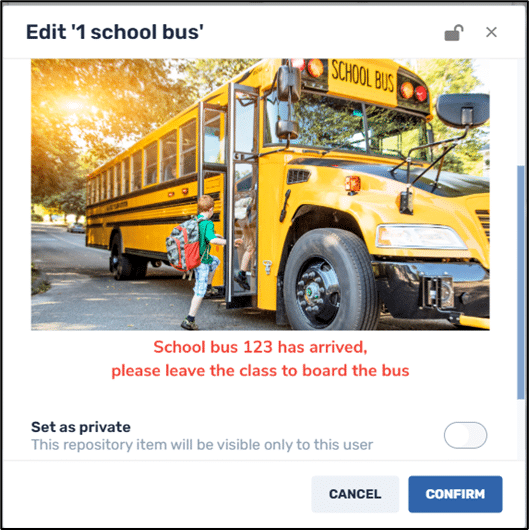
This option allows you to apply an asset, such as an image or audio file, to a device. You may upload an audio file or record one using the Radix Device Management interface. You can then use these images or audio files in other Radix Device Management applications, such as Advanced Messaging. In the example below, the image asset can inform pupils in an elementary school to go to their bus.
Device Settings
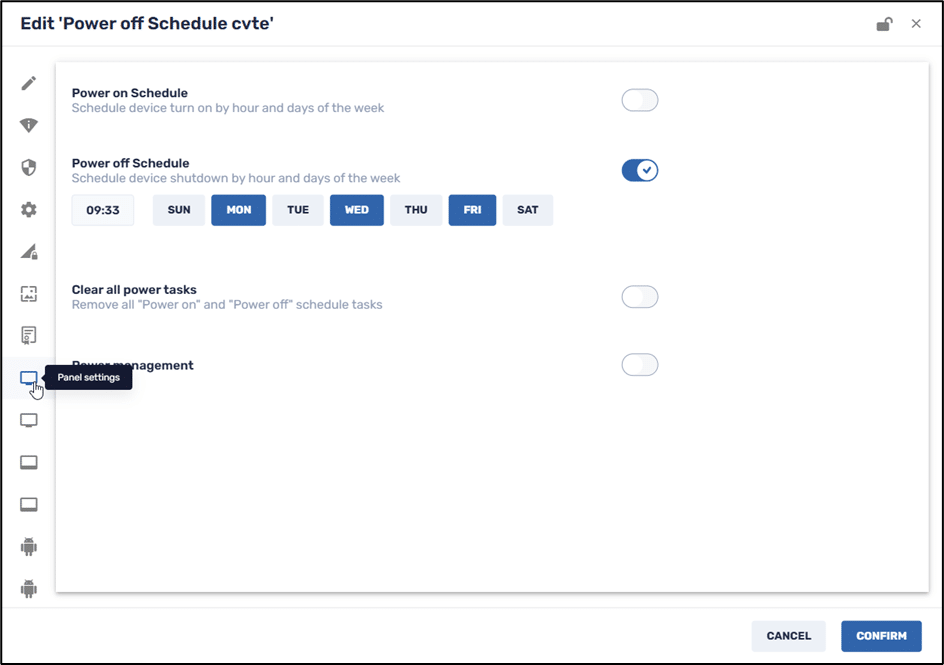
This Repository item option allows the Radix Device Management user to create a configuration of device settings that can be saved and applied to a fleet of devices at once. The settings could include selecting a type of keyboard, enabling or disabling a screen saver, configuring a printer, or performing a reset on the device. In our example below, the device setting will turn off a CVTE screen on a certain schedule:
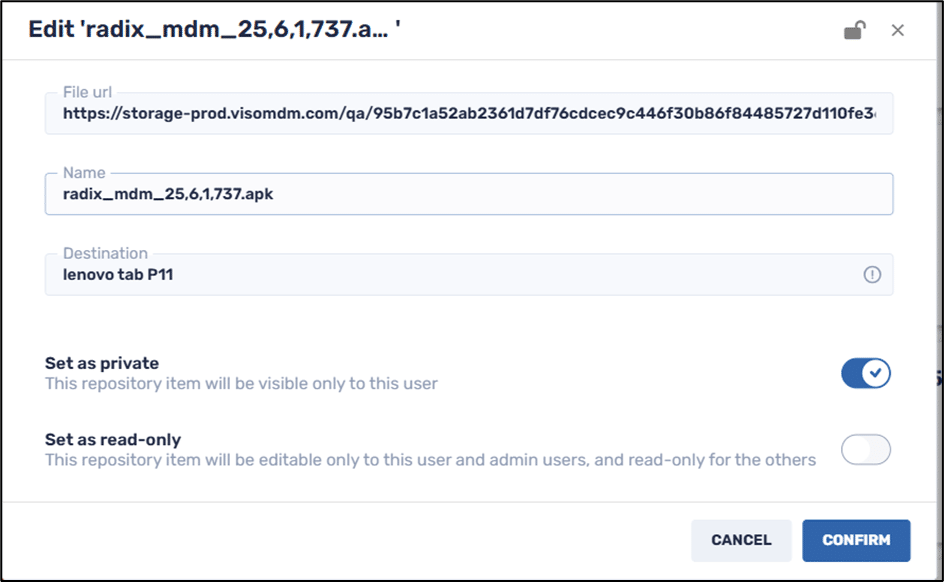
Files
This option allows you to assign specific files to be sent to devices. The files can be from a computer, or from an URL. In the example below, we send an Android installation package from a URL to a Lenovo Tab P11 device.
Remote Execute
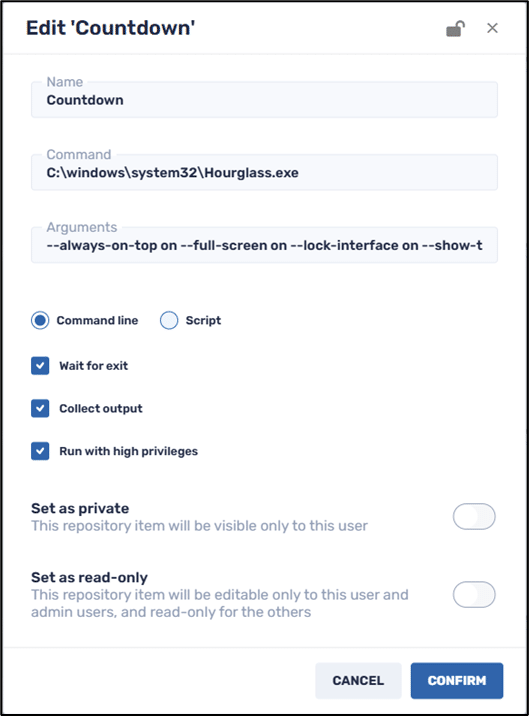
This repository item allows you to create a command-line command or script and send it to a device. The script can be for a Windows or Android device. In the example below, the command will perform a 30-second countdown along with displaying an hourglass icon.
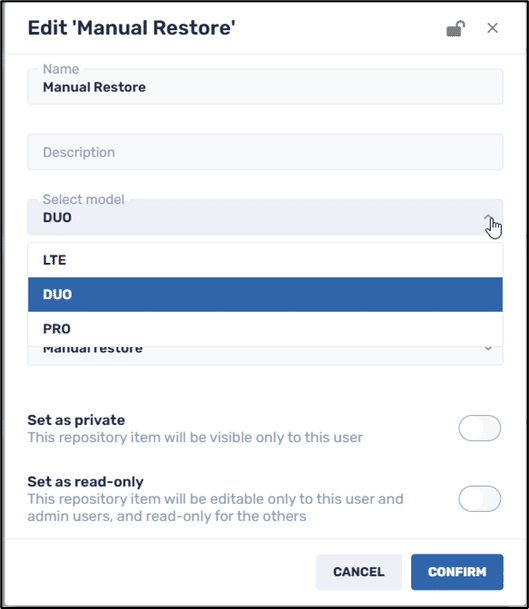
Smart Recovery
This allows you to run the Radix Smart Recovery program on a remote Windows device. It allows you to restore a device’s system configuration and settings to the latest system snapshot, or factory settings.
Smart Recovery comes in three versions:
- LITE This lets you restore a Windows computer back to a baseline point.
- DUO This lets you restore a Windows computer either to a baseline point or another dynamic point that you can define.
- PRO This allows you to restore a Windows computer to more snapshots of the system than just a baseline or a dynamic point.
The example below uses Smart Recovery Duo and will change the settings on the Windows device from an automatic restore to a manual restore.
DEP Apple profile
This allows you to set up a Device Enrollment Program (=DEP) for a remote Apple device. Below, we see how the DEP Apple profile setup looks:
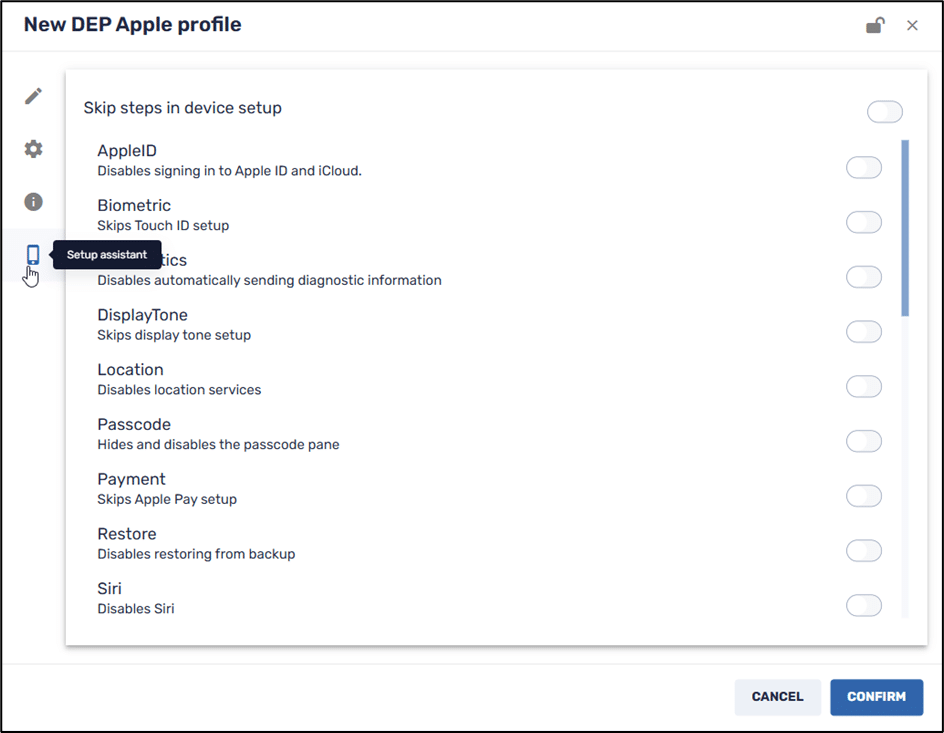
Note: Once you have created a new DEP Apple profile, it cannot be edited. You can either delete it or create a new one.
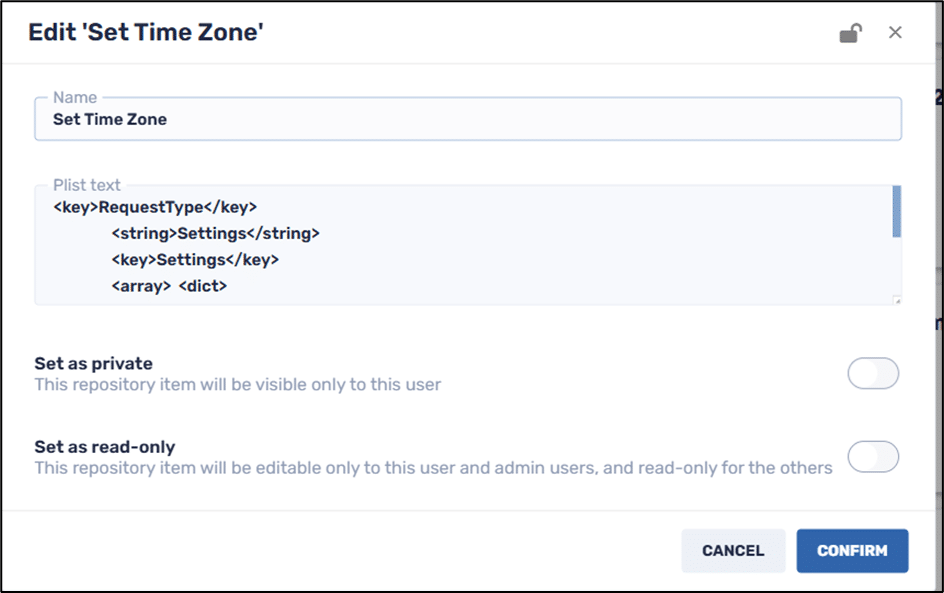
Apple Custom Command
This option allows you to create a plist (=property list) file to be applied to a MacOS device. In the example below, the script will set the time zone on the remote Apple device.
OTA Update Engine
This allows you to remotely receive updates on a remote Android device’s operating system or apps.

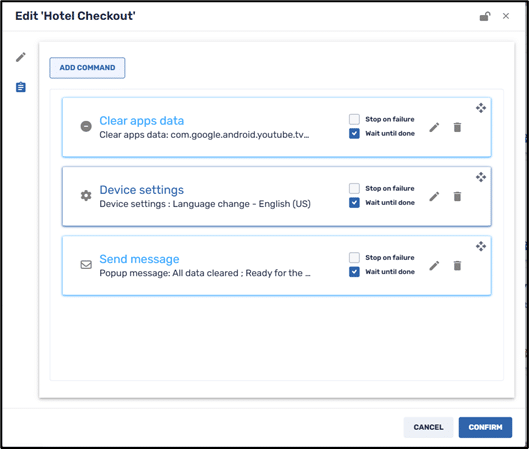
Workflow
This allows you to create a series of commands to a device, to be executed sequentially. For example, sending the workflow below for checking out of a hotel will
- Clear the app data on the remote device in the hotel,
- Adjust the device settings, and
- Send you a message that the Android device is ready for use for the next person checking into the hotel.
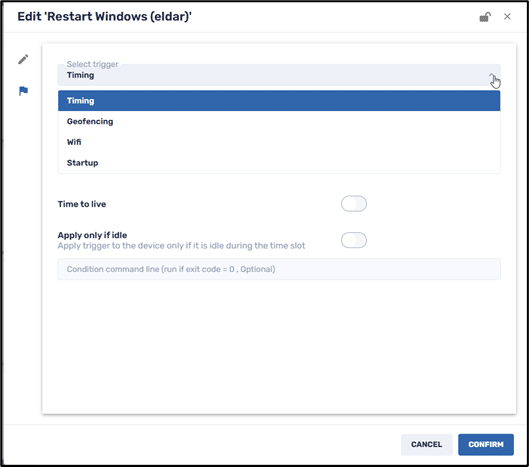
Schedule & Trigger
This allows you to create a command to be sent to a device, along with a trigger for when to implement the command. The trigger can be timing, geofencing, a Wi-Fi signal, or upon startup of the device. The example below will restart a Windows device at a certain time.
Using Repository Items
You can create and store repository items using the Repositories Console from the Repository sidebar icon. However, to actually implement these repository items, you will have to use an alternate method:
Method One: Using the Device Dashboard
1. Open the Radix Device Manager and click on the Devices icon in the sidebar menu.
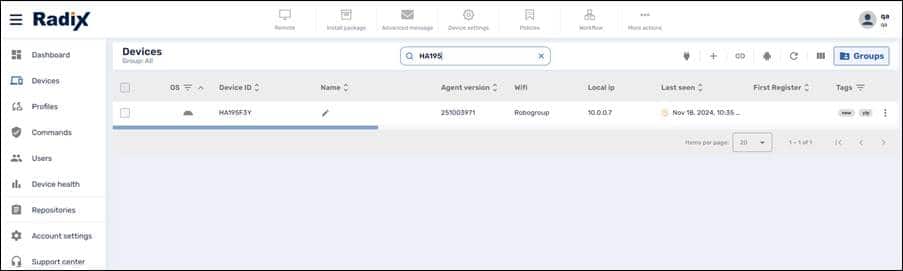
2. In the Devices Console that opens, find the device to which you wish to employ the Repository option. You can use the Search Bar to narrow down the possibilities.
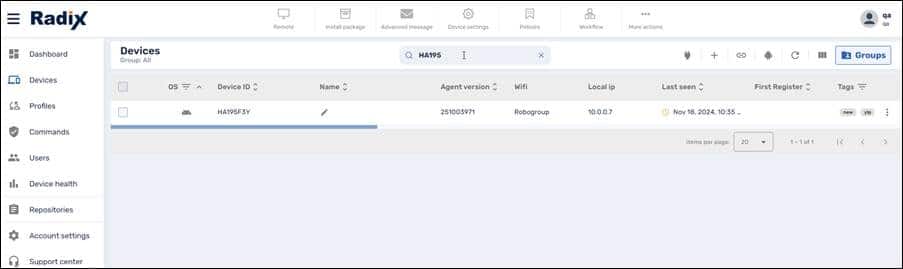
3. Click on the row of the device to open the Device Dashboard.
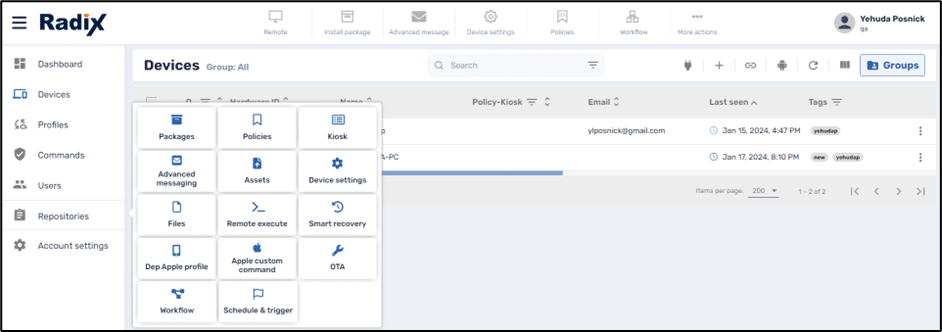
4. In the Device Dashboard, click on the Repositories actions tile.
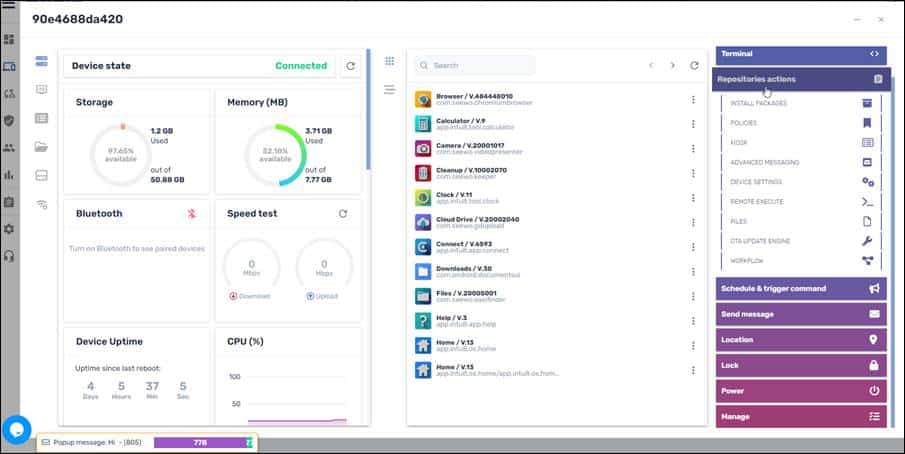
5. Select the Repository item that you would like to employ.
Method Two: From the Devices Console Ribbon:
1. Open the Devices console.
2. From the list, select the device for which you want to employ a Repository item, by checking the checkbox in the far-left column.
3. From the Devices Console Ribbon at the top of the screen, find the Repository item. The options Install package, Advanced Message, Device settings, Policies, and Workflow appear at the top, while the remaining Repository actions are under More actions.
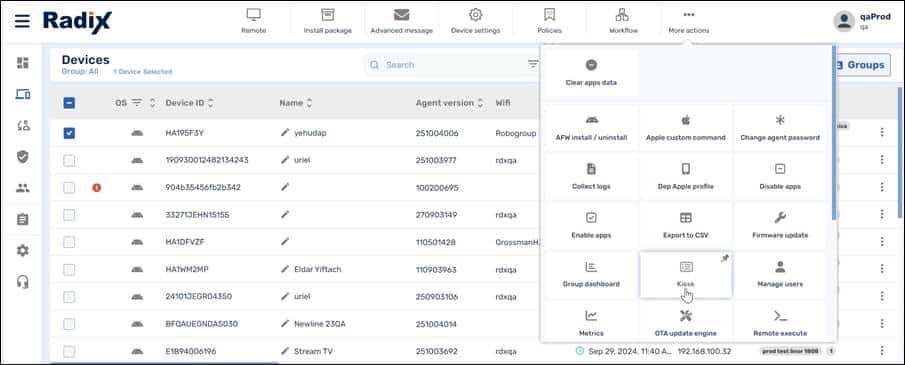
Note: This method has the advantage of allowing you to check the checkboxes on several devices, and then employ the Repository item action on all of the devices at once.
Method Three: From the device’s three-dot menu:
1. Open the Devices console.
2. From the list, find the device for which you want to apply the Repository item. You can use the Search bar at the top of the list.
3. Click on the three-dot (kebab) menu in the far-right column of the device.
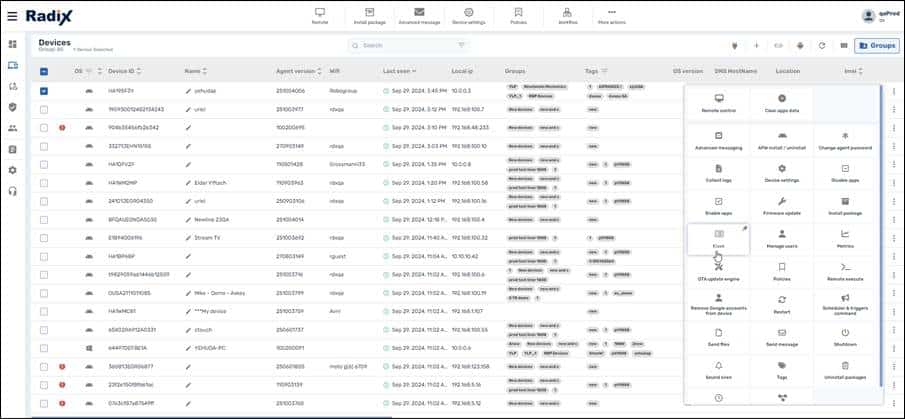
4. Select the desired Repository item option from the grid of commands. In the example below, we selected the Kiosk option.