Android TV & STBs
  Interactive screens
  Digital Signage
  Information Kiosk
  Phones, Tablets, and Laptops
  Point Of Sale Devices: PoS/mPOS
  Rugged devices
  Custom devices
  Configuration Management
  Remote Support
  App Management
  Kiosk Mode
  Device Analytics
  Firmware Management
  Geo-fence and Anti-theft
  Customer Care


 TV Operators
  Hospitality
  Education
  Healthcare


After creating and displaying a View option on remote devices, this locks these devices into just displaying that View and a selected number of apps. If you want the remote devices to revert to their full functionality, you will have to edit the View and remove the devices from that View. You will be able to associate a group of devices with another view only after stopping the view presently displayed on those devices.
You can disassociate a device from a View in one of two ways:
- Removing the Group from the View
- Removing the identifying tag from the device or group of devices
If you assign a group to two views at once, the devices in the group will start displaying the second view as soon as you disassociate the group from the first view.
Method One: Removing the Group from the View
To remove the group to which you have applied the view:
1. Click the View icon on the view that you are currently displaying.
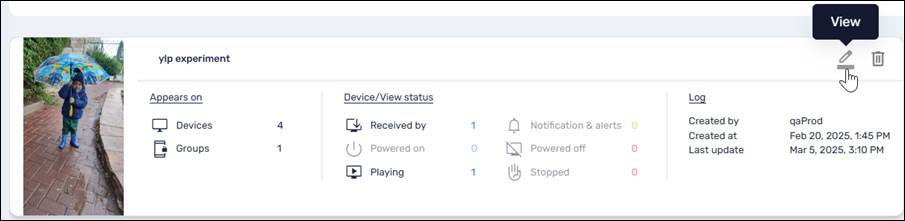
2. In the drop-down list in the upper left corner, select Draft version. This will allow you to modify the View.
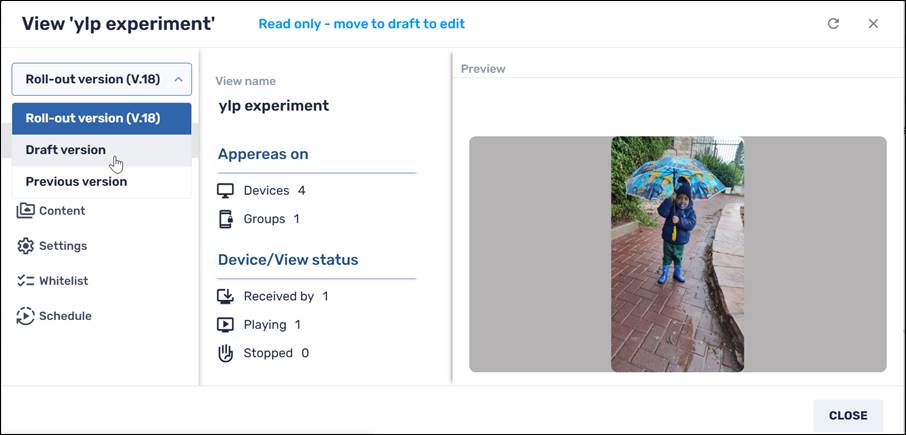
3. Go to the Population tab.
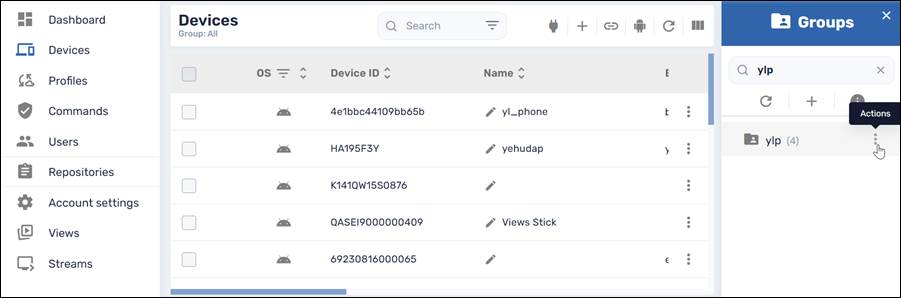
4. In the Groups pane, remove the group associated with the View. In the example below, we will delete the group “ylp” from the View.
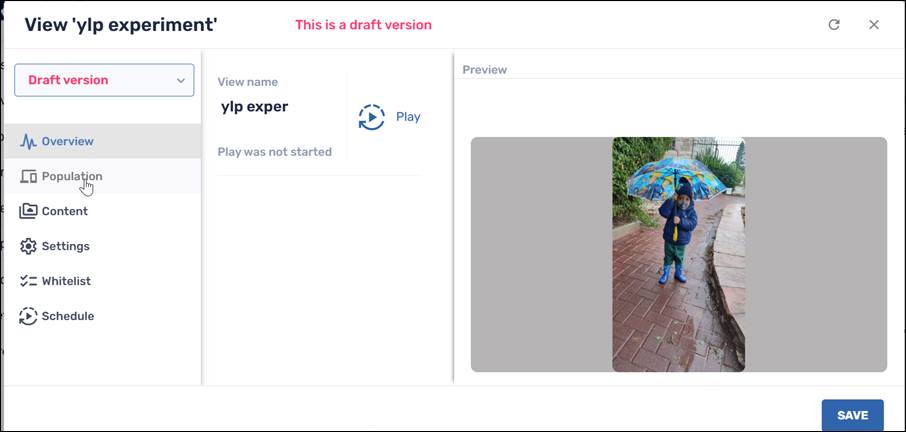
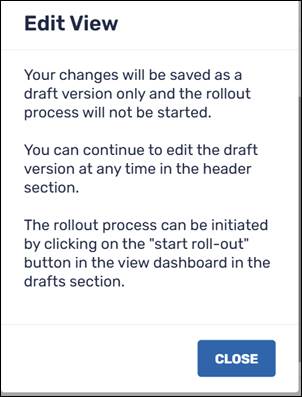
5. When you click Save, you will receive the following notification:
6. Close the notification window and click on Play in the Overview tab in the Draft Version window. The Radix Device Manager will prompt you if you wish to activate the new version of the view, with no group associated with it:
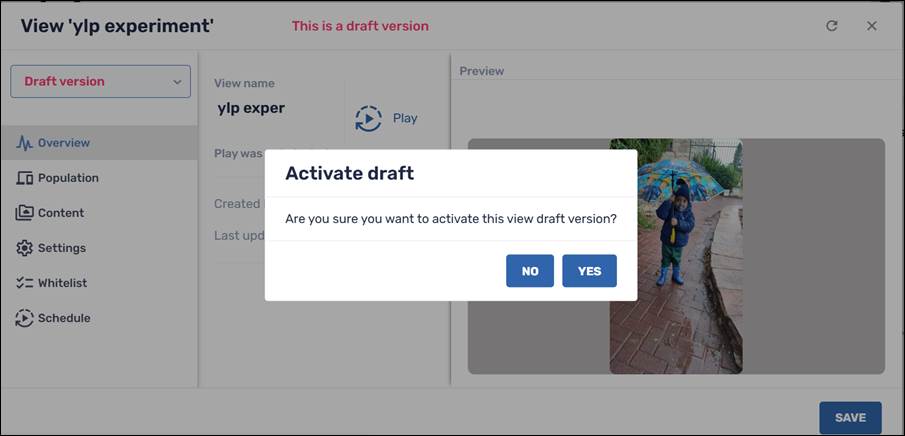
7. Click Yes to activate the draft of the View with no devices associated with it. This will close the notification window. The View will now indicate that there are no groups or devices associated with it.
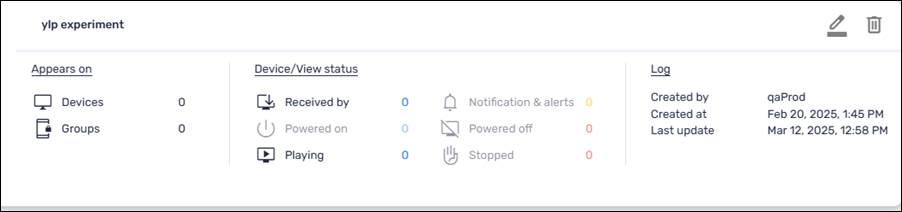
The View appears on 0 devices and 0 groups
Syncing the New View with the Devices
It is not sufficient to remove the group of devices from the View. You must also sync between the new View and the remote devices. You do this with a Remote Execute Android script.
8. In the Groups window, click on the three-dots Actions icon to open the menu of Groups commands.
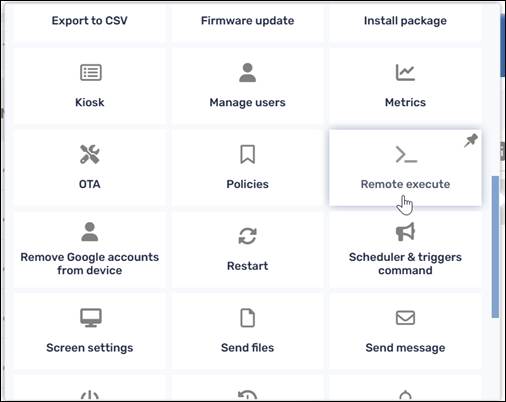
9. Select the Remote Execute command.
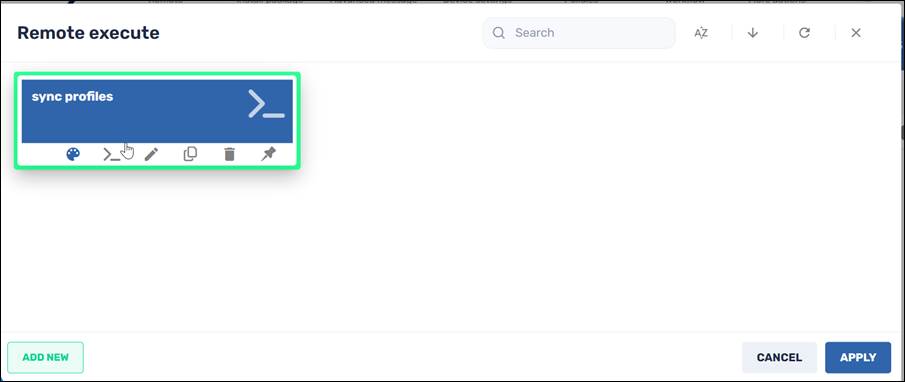
10. In the repository of Remote Execute commands, select the “sync profiles” command and click Apply. This particular remote execute command contains an Android command that will sync the new profile with the devices in the group.

11. If your repository of Remote Execute commands doesn’t have the “sync profiles” command, click on Add New to open the New remote execution window.
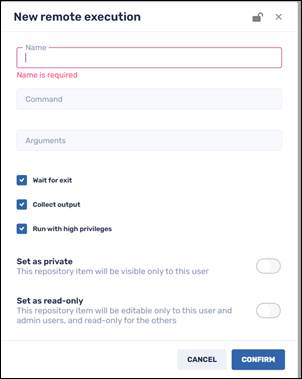
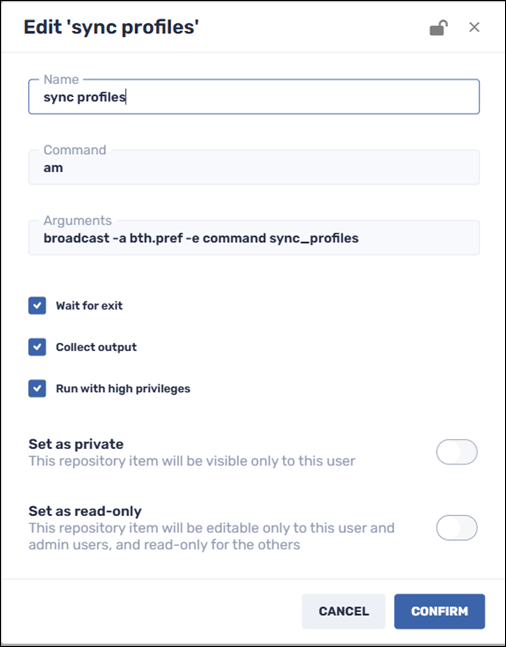
The sync profiles command appears as follows:

12. Fill out the Name, Command, and Arguments fields, and click Confirm. This will save the new Remote Execute command in the repository.
13. Click on the Sync Profiles tile and click Apply.
The devices in the group will stop displaying the View.
Method Two: Removing the Tag
Another method of stopping the device from displaying the View is to remove the identifying tag from the individual device or group of devices. This will also disassociate that device from the View.
To remove the tag from an individual device:
1. In the Devices Console, find the device from which you wish to delete the tag that associates the device with the View.
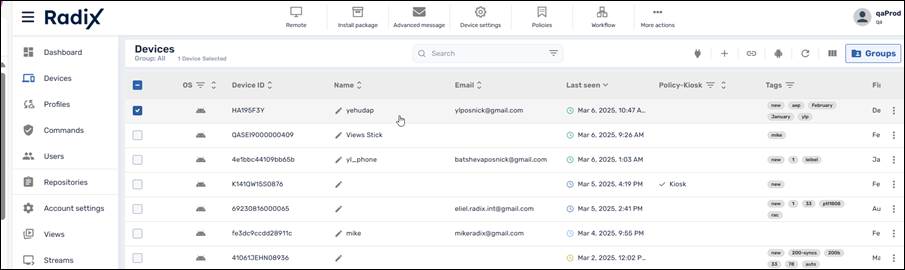
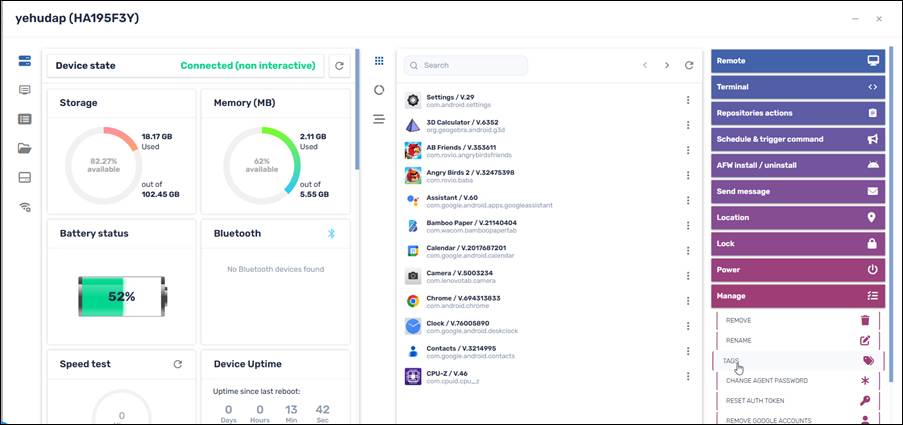
2. In the Device Dashboard, go to Manage>Tags.
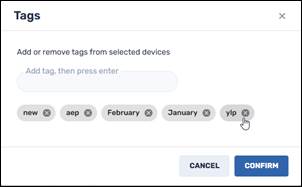
3. In the Tags window, delete the tag that associates the device with this group. In our case, we will delete the tag “ylp”. Click on the x icon and click Confirm.
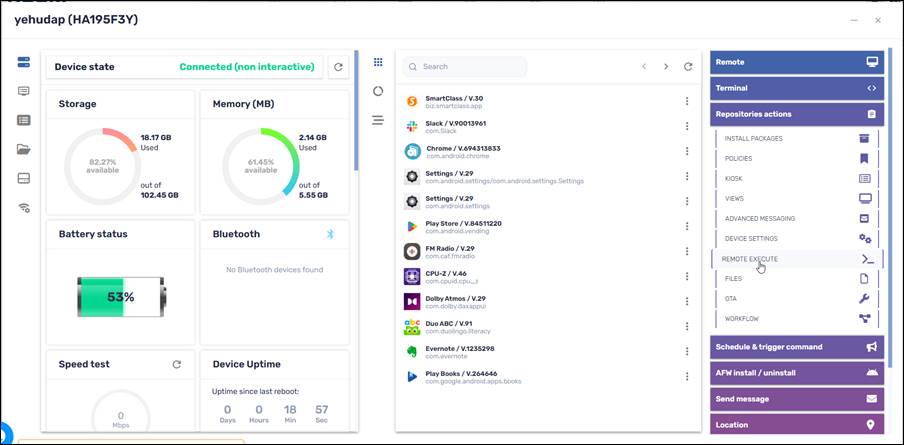
4. In the Device Dashboard, go to Repositories actions, and select the Remote Execute command.
Syncing the New View with the Devices
As above in the first method, you must sync the remote devices with the new, modified version of the View.
5. In the repository of Remote Execute commands, select the “sync profile” command and click Apply. This has been supplied with an Android command that will sync the new profile with the devices in the group.

6. If your interface doesn’t have the sync profiles command, click Add New to create a new Remote Execute option. The sync profiles command appears as follows:
The selected device will stop displaying the View.
Deleting a View
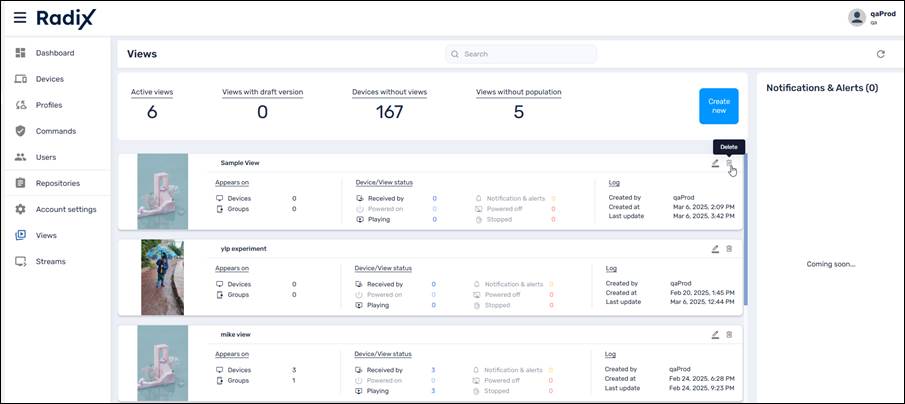
To delete a view from the Views console:
1. In the row of the view, click on the Delete icon.
The Device Manager prompts you if you are sure that you want to delete the selected view:
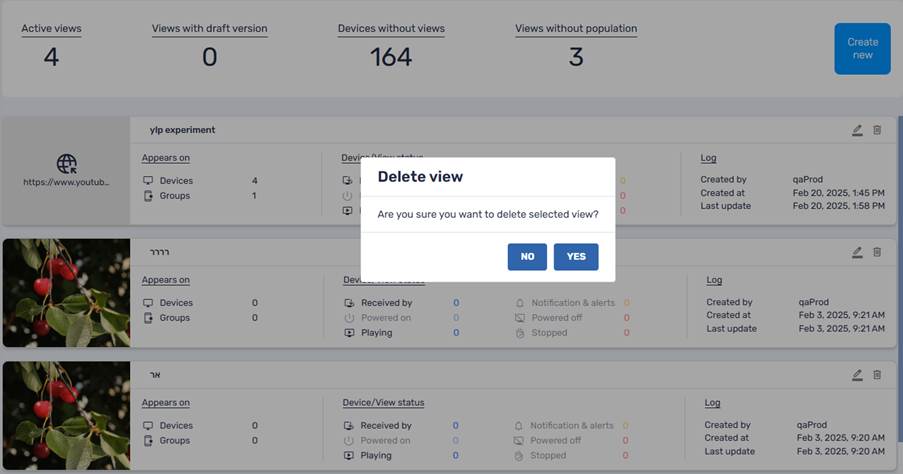
2. Click Yes to delete the view.