Android TV & STBs
  Interactive screens
  Digital Signage
  Information Kiosk
  Phones, Tablets, and Laptops
  Point Of Sale Devices: PoS/mPOS
  Rugged devices
  Custom devices
  Configuration Management
  Remote Support
  App Management
  Kiosk Mode
  Device Analytics
  Firmware Management
  Geo-fence and Anti-theft
  Customer Care


 TV Operators
  Hospitality
  Education
  Healthcare


Smart Recovery is a Windows application created by Radix that allows you to implement settings to repair a Windows device that has crashed. Smart Recovery LITE is the simplest version of the Smart Recovery application, which allows you to restore your Windows device to a previous baseline state. (Other versions of Smart Recovery allow you to create other restore points as well.)
Note: You must have Smart Recovery LITE installed on the remote Windows device. Only then can you control the use of Smart Recovery from the Radix Device Manager.
Locating the Smart Recovery LITE command
Where can you find the command:
- The Devices Console Ribbon, under the More Actions icon,
- The device’s three-dot menu,
- The Device Dashboard, under the Power tab.
Method One: From the Devices Console Ribbon:
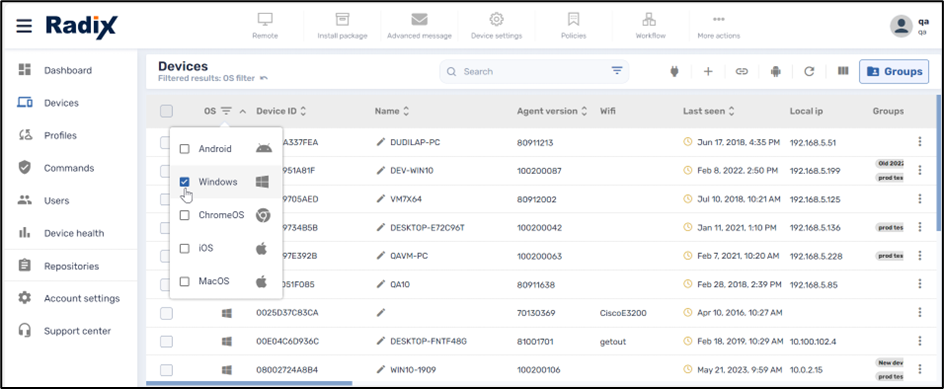
1. Click on the Devices icon in the sidebar menu, to open the Devices console.
2. Since you only can apply Smart Recovery to Windows devices, you may want to filter out the devices in the list by their operating system. Click on the Filter icon in the OS column, to display only Windows devices.
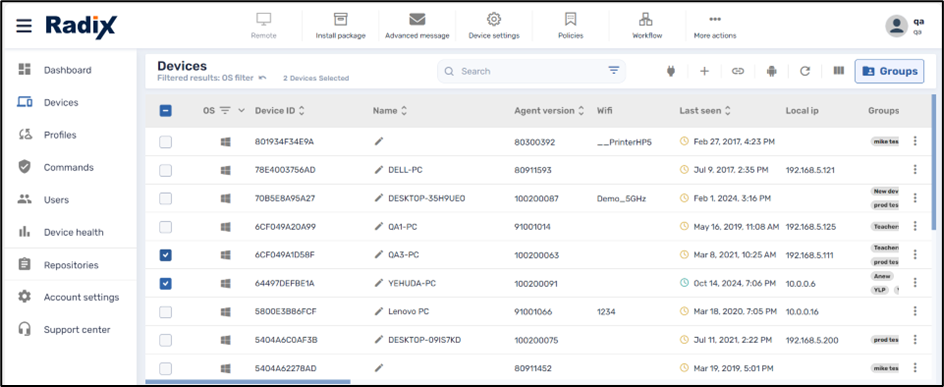
3. From the list, select the Windows device onto which you wish to use Smart Recovery, by checking the checkbox in the far-left column. Using this method, you can select several devices and employ Smart Recovery on all of them at once.
4. From the Devices Console Ribbon at the top of the screen, click More actions.
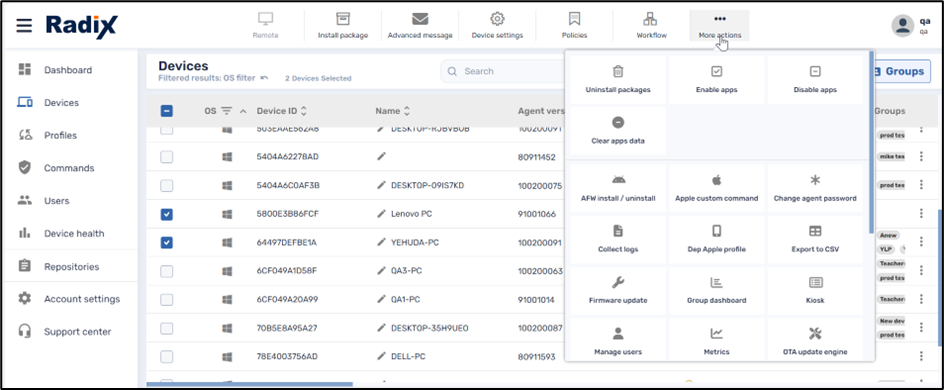
5. From the grid of commands, select Smart Recovery.
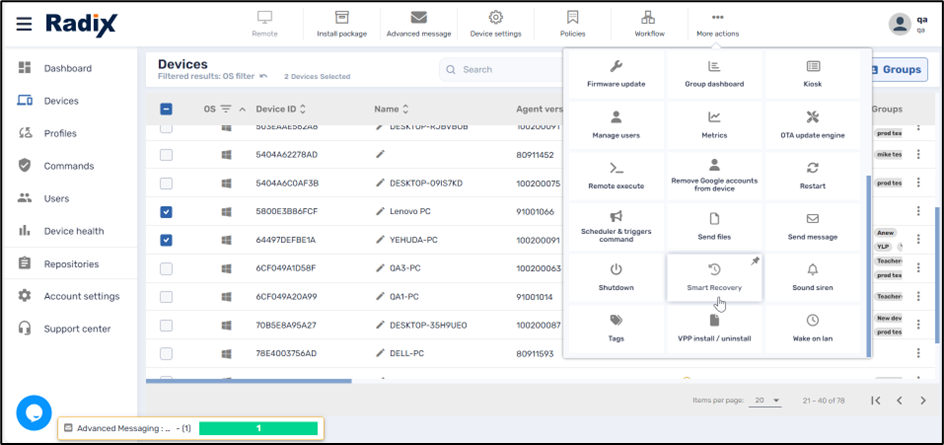
6. Continue from Using the Smart Recovery LITE App below.
Note: This method has the advantage of allowing you to check the checkboxes on several devices and apply Smart Recovery on all of the devices simultaneously.
Method Two: From the device’s three-dot menu:
1. Open the Devices console.
2. From the list, find the device to which you would like to employ Smart Recovery. You can use the Search bar at the top of the list to locate the device.
3. Click on the three-dot (kebab) menu in the far-right column of the device.

4. Select Smart Recovery from the list of commands.
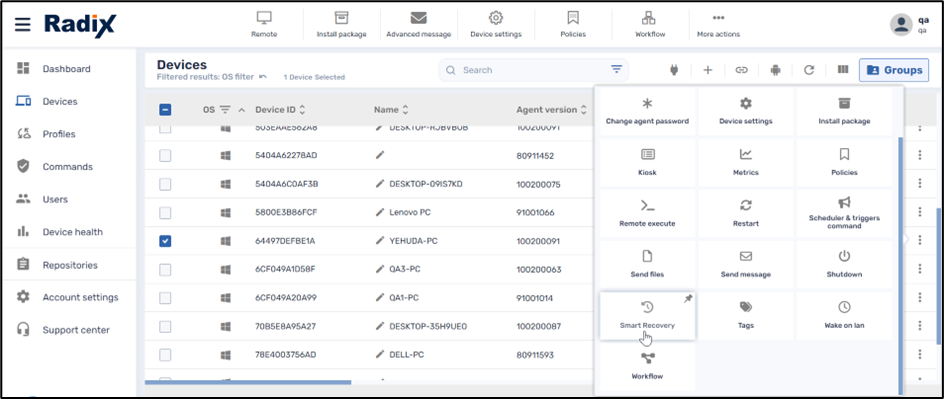
5. Continue from Using the Smart Recovery LITE App below.
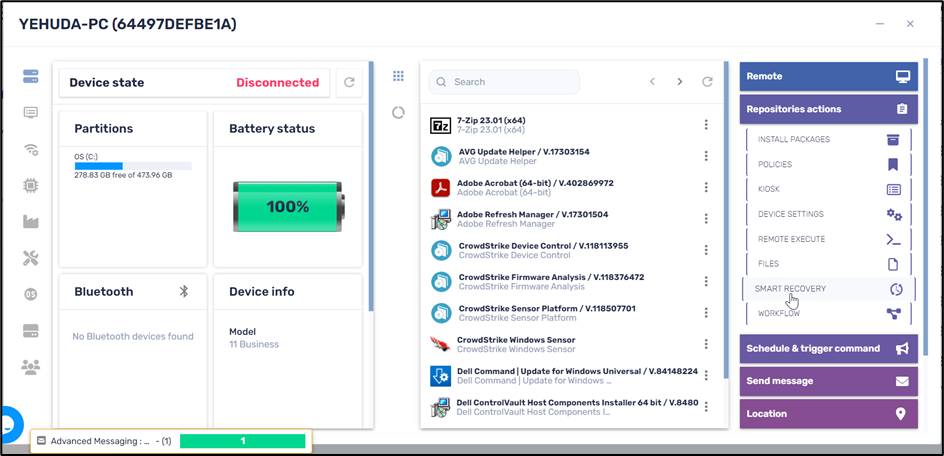
Method Three: From the device’s Device Dashboard:
You can also access the Smart Recovery command from the Device Dashboard.
To open the Device Dashboard:
1. Open the Devices console.
2. From the list, find the device for which you want to apply Smart Recovery. You can use the Search bar at the top of the list.
3. Click anywhere on the row of the specific device.
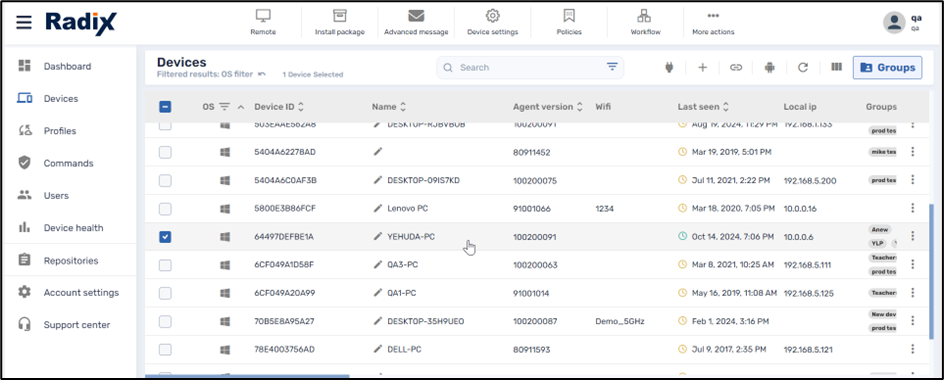
The Device Dashboard will open.
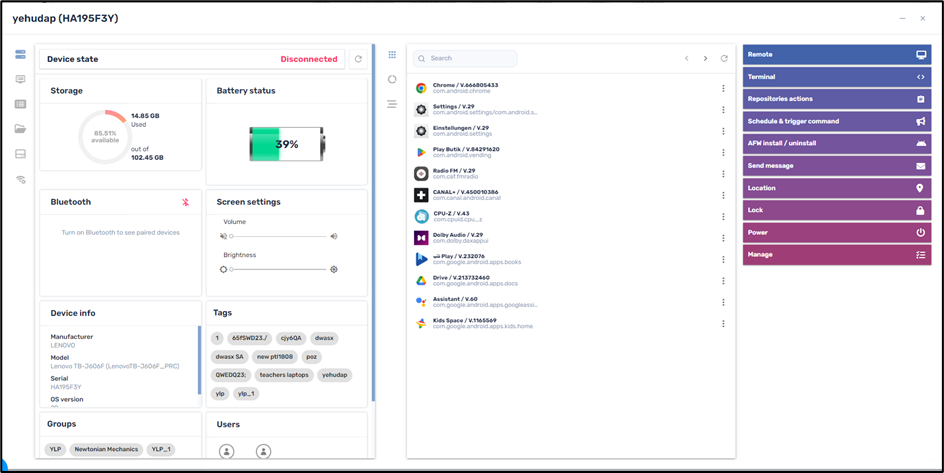
4. Click on Repositories actions in the menu on the far-right side, and select Smart Recovery.
5. Continue from Using the Smart Recovery LITE App below.
Using the Smart Recovery LITE App
When you click on the Smart Recovery option, the Smart Recovery window opens, displaying a repository of saved options.

You can use one of the saved options by selecting it and clicking Apply in the lower right corner.
If you wish to create a new Smart Recovery LITE option:
1. Click Add New. The New Smart Recovery window opens.
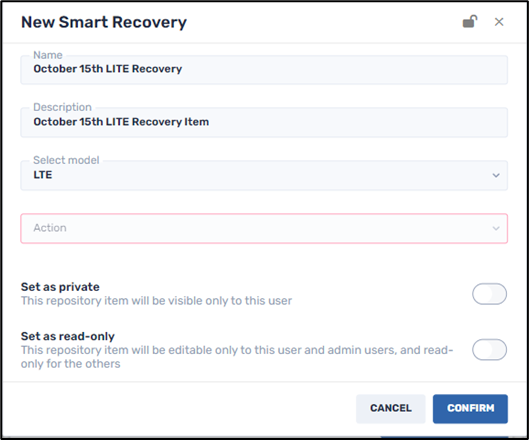
2. Select a name and description of the recovery activity.
3. Select the LITE model of the Smart Recovery application from the drop-down list.
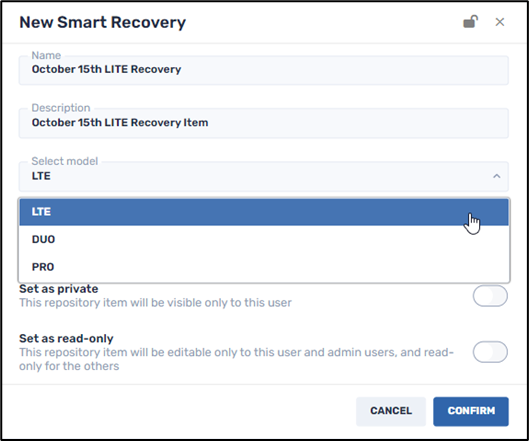
Smart Recovery options to be applied to a remote device
The Smart Recovery LITE app allows you to restore a Windows device to a previous baseline state. You can choose between:
An Automatic Restore Mode, where the computer undergoes a system restore every time it boots, or
A Manual Restore Mode, where the computer is restored to the most recently saved baseline state. Smart Recovery LITE allows only one baseline point.
4. Choose an action from the drop-down menu. We will go through the options in detail:
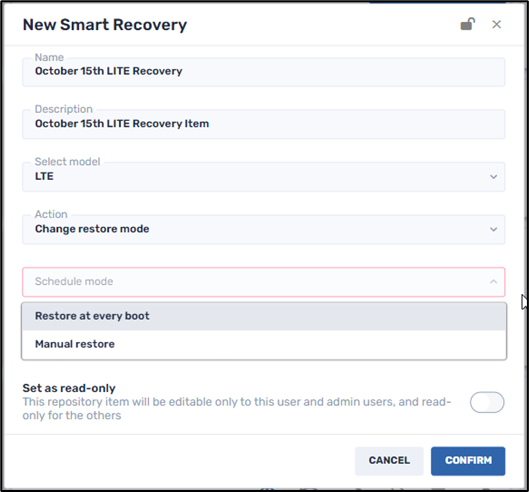
Change restore mode
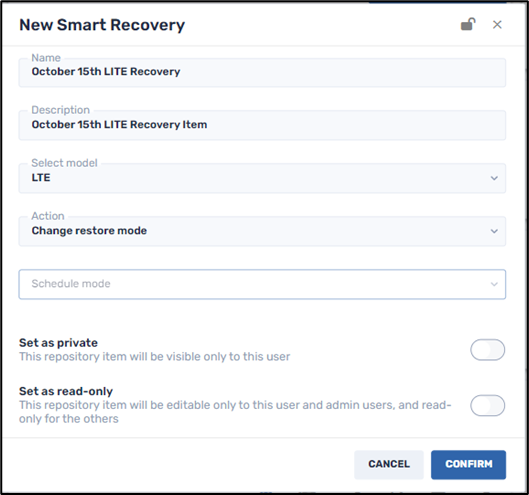
You can select between restoring the system either:
- Automatically restoring the system at every reboot, or
- Performing a manual restore.
Automatically restoring the system to a baseline configuration each time the device is booted may be desirable if you wish to undo any changes that remote users perform on their devices. For example, it may be that they installed a program, or downloaded content that may hamper the functioning of the computer.
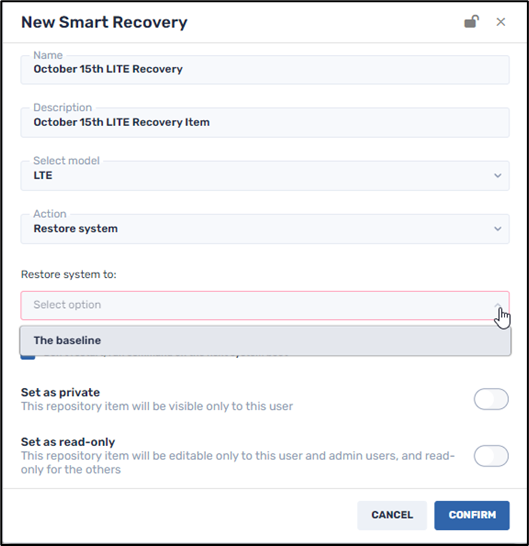
Restore system
Smart Recovery LITE allows you to restore the system only to the baseline (root) state. (Other versions of Smart Recovery allow you to restore the computer’s system to a dynamic restore point, or factory settings.)
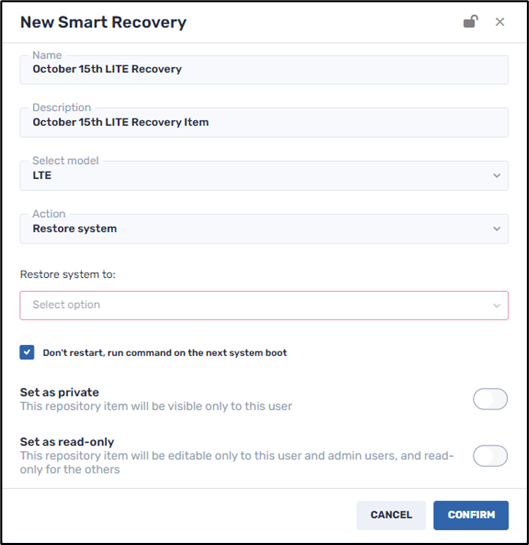
Note that there is also a checkbox “Don’t restart, run command on the next system reboot”.
- If you check this box, the computer will only revert back to the baseline restore point when you reboot the computer.
- Otherwise, if you leave the box unchecked, the remote computer will restart immediately when it receives the Smart Recovery command, and perform a system restore to the baseline restore point during the restart process.
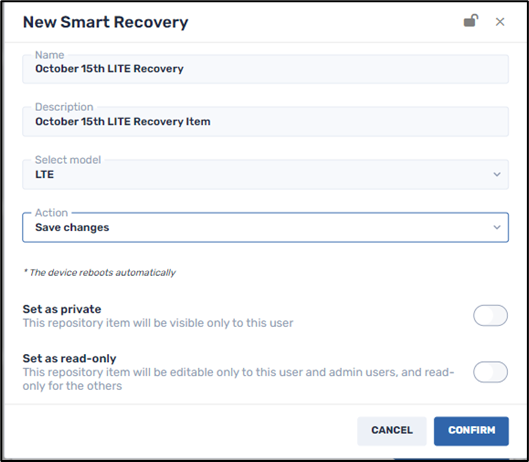
Save changes
This allows you to save the system configuration as it is currently and perform a reboot. This will be the restore point from now on.
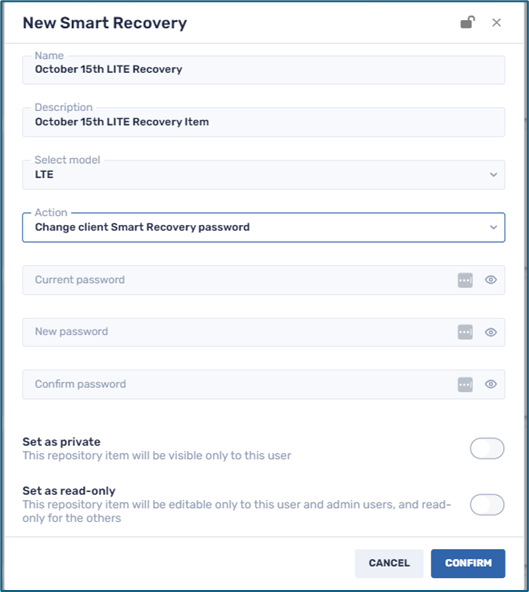
Change client Smart Recovery password
This lets you create a new password for the user when they wish to configure their use of the Smart Recovery app. You enter the user’s current password, then the new password.
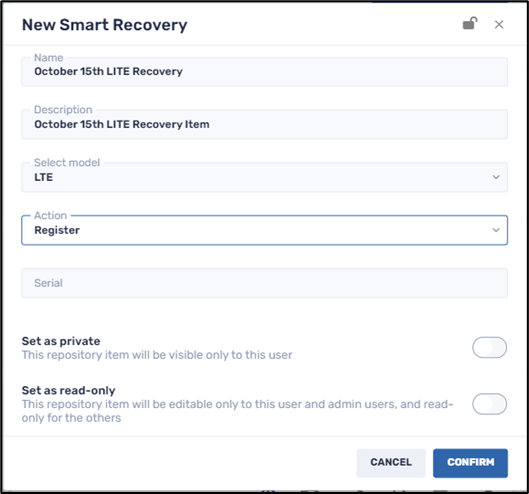
Register
This option lets you register a client using the Smart Recovery app, using the registration serial number.
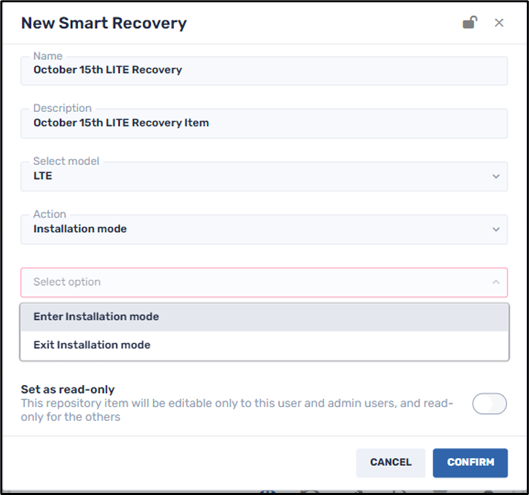
Installation mode
This allows you to install Smart Recovery on the selected Windows device.
You have options of either entering or leaving installation mode.
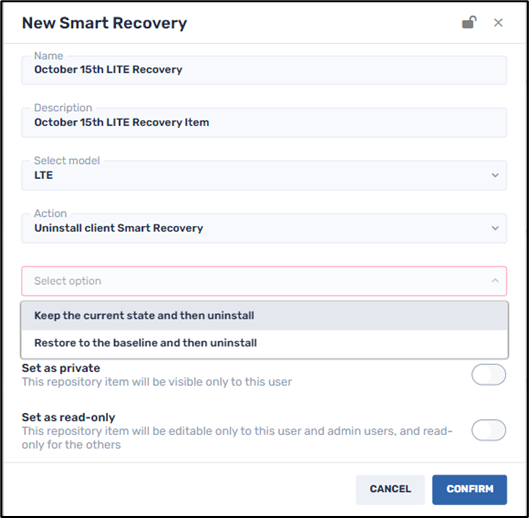
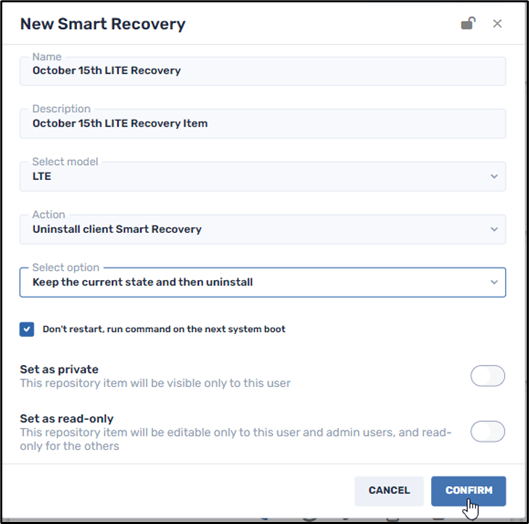
Uninstall client Smart Recovery
This lets you uninstall Smart Recovery on remote devices. You can either:
- Keep the current system and then uninstall Smart Recovery,
- Restore the device to its baseline settings, and then uninstall Smart Recovery.
There is also the checkbox “Don’t restart, run command on the next system boot”.
- Checking this box will uninstall Smart Recovery on the remote computer the next time that the remote user reboots their device.
- If you do not check the box, the remote computer will uninstall Smart Recovery immediately when it receives the command.
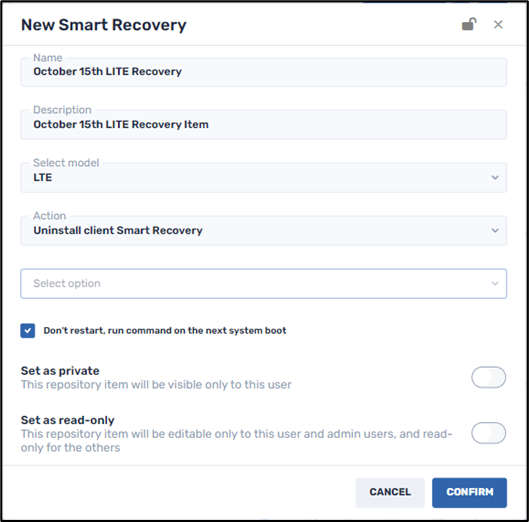
Illustration of “Don’t restart” checkbox
5. Click on the Set as private button if you want this Smart Recovery option to be visible only to you (as the creator of the item) when you log in to the Radix Device Manager.
6. Click on the Set as read-only button if you want to restrict who will be able to modify the details of this Smart Recovery option. Anyone with Administrator privileges can edit it, while someone with only User privileges can only access it and use it but cannot edit it. When you click on Set as read-only, you will see the lock icon at the top of the screen turn to a “locked” position .
7. Click Confirm. The Smart Recovery method will be saved and added to the repository of Smart Recovery options.
8. To implement a Smart Recovery method, select it from the list, and click Apply.
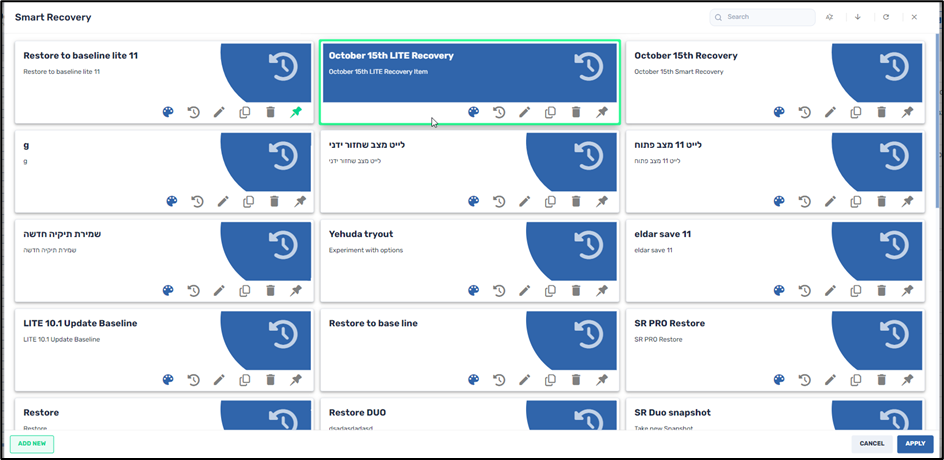
The Smart Recovery option “October 15 LITE Recovery” has been selected
The Smart Recovery function will be applied to the selected Windows device. You will receive a confirmation that the command was sent to the remote device in the lower right corner.